How To Use The Warming Drawer On An Oven For Beginners
The warming drawer is one of the most useful yet overlooked features on modern ovens. It keeps food at a safe, steady temperature without drying it out. This guide covers everything from basic setup to advanced tips for beginners. You will learn how to use the warming drawer correctly, what foods work best, and common mistakes to avoid.
If you have ever opened your oven and spotted a small drawer underneath, you are not alone. Many people have no idea what that warming drawer is for. Some think it is a storage space for pans. Others ignore it completely. But the truth is, this little drawer is a hidden gem in your kitchen.
A warming drawer does exactly what the name suggests. It keeps your food warm after cooking. Whether you are hosting a dinner party or preparing meals ahead of time, knowing how to use the warming drawer on an oven can change the way you cook. This guide is written for beginners who want to get the most out of this handy feature.
By the end of this article, you will understand what the drawer does, how to set it up, which foods work best, and how to avoid common mistakes. Let us dive in and explore the world of the warming drawer together.
Key Takeaways
- A warming drawer keeps food warm: It uses low, steady heat to maintain serving temperature without overcooking.
- It works for more than just meals: You can use it for dough proofing, warming plates, and slow-cooking side dishes.
- Temperature control matters: Most drawers operate between 170 and 200 degrees Fahrenheit for safe warming.
- Proper placement is key: Always use oven-safe containers and avoid covering dishes tightly.
- Common mistakes are easy to avoid: Overloading, using plastic, and skipping preheating are top errors beginners make.
- Regular cleaning extends its life: A simple wipe-down after each use keeps the drawer working well for years.
📑 Table of Contents
- What Is a Warming Drawer and How Does It Work
- How to Set Up and Prepare Your Warming Drawer
- Best Foods and Dishes to Warm in the Drawer
- Temperature Settings and Timing Guide
- Common Mistakes and How to Avoid Them
- Cleaning, Maintenance, and Pro Tips
- Warming Drawer vs. Other Warming Methods
- Frequently Asked Questions
- Conclusion
What Is a Warming Drawer and How Does It Work
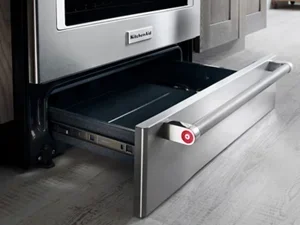
A warming drawer is a compartment located below the oven cavity. It sits at the bottom of your range and uses a separate heating element. Unlike the main oven, which reaches high temperatures for baking and roasting, the warming drawer operates at a much lower heat level. This makes it perfect for keeping cooked food at a safe serving temperature.
Most warming drawers maintain temperatures between 170 and 200 degrees Fahrenheit. This range is hot enough to keep food warm but gentle enough to prevent drying or burning. The heat spreads evenly across the drawer floor, which helps maintain consistent warmth throughout your dishes.
How the Warming Drawer Differs from the Oven
The main oven and the warming drawer serve very different purposes. Your oven uses high heat to cook raw ingredients. The warming drawer uses low heat to maintain the temperature of already-cooked food. Think of it as a holding zone rather than a cooking zone.
Another key difference is the heat distribution. Ovens blast hot air from the top and bottom to cook food quickly. The warming drawer relies on gentle, ambient heat. This slow and steady approach is what makes it so effective for keeping meals ready without overcooking them.
Some people also confuse the warming drawer with a storage drawer. If your oven has a drawer that does not heat up at all, that is a storage compartment. A true warming drawer will have a control knob or button on the front panel. It may also have a light that turns on when the drawer is active.
How to Set Up and Prepare Your Warming Drawer
Setting up your warming drawer is simple. But taking a few extra steps before your first use can make a big difference in performance. Let us walk through the basics.
Placement and Positioning
The warming drawer sits directly below the oven. When you open the oven door, the drawer is right there for easy access. Most models slide out fully, giving you plenty of room to place dishes inside. Make sure the drawer is on a flat, stable surface and that nothing is blocking the vent at the back.
If you have a freestanding range, the warming drawer is already positioned correctly from the factory. For built-in ovens, check that the drawer slides in and out smoothly. A stuck drawer can cause uneven heating or damage to the heating element over time.
What to Put Inside
Before using the warming drawer, make sure you have the right containers. The drawer is designed for oven-safe dishes only. Glass, ceramic, and metal cookware all work well. Never place plastic containers, paper plates, or wooden utensils inside the warming drawer. These materials can melt, warp, or even catch fire at high temperatures.
For best results, use shallow, open containers. Deep pots with tight lids trap steam and can make food soggy. A wide, uncovered dish allows heat to circulate around the food evenly. This is one of the simplest ways to improve your warming drawer results.
Best Foods and Dishes to Warm in the Drawer
The warming drawer is incredibly versatile. Once you understand its capabilities, you will find all kinds of uses for it in your daily cooking routine. Here are some of the best foods and dishes to warm in the drawer.
Meals That Benefit from a Warming Drawer
The most obvious use for a warming drawer is keeping cooked meals warm until serving time. This works especially well for:
- Roasted meats: Chicken, turkey, beef roast, and pork loin all stay juicy in the warming drawer.
- Casseroles and baked dishes: Lasagna, mac and cheese, and potato gratin hold their heat beautifully.
- Side dishes: Mashed potatoes, steamed vegetables, and rice stay warm without needing constant attention.
- Bread and rolls: Homemade bread stays soft and warm when placed in the warming drawer for a few minutes.
When you are hosting a dinner party, the warming drawer becomes your best friend. You can prepare dishes ahead of time and keep them at the perfect temperature. This takes the stress out of serving a large meal all at once.
Using the Drawer for Dough Proofing
Here is a lesser-known trick. The warming drawer can be used for dough proofing. The low, steady heat creates a warm environment that helps bread dough rise. Simply place your covered bowl of dough inside the drawer and let it do its work.
This works especially well in cold kitchens or during winter months. The consistent temperature of the warming drawer replaces the need for a dedicated proofing box. Just make sure the temperature stays below 100 degrees Fahrenheit for best results. Too much heat can kill the yeast and prevent the dough from rising properly.
Warming Plates and Bowls
Nothing ruins a great meal faster than a cold plate. The warming drawer is perfect for warming dinner plates, bowls, and serving dishes. Simply place them inside for five to ten minutes before your meal. Warm plates keep food at the right temperature longer and make every dish feel more restaurant-quality.
This is a small detail that makes a big impression at dinner parties. Your guests will notice the difference, and you will appreciate how easy it is to pull off.
Temperature Settings and Timing Guide
Getting the temperature and timing right is essential for using the warming drawer effectively. Too much heat can dry out food, while too little heat may not keep it safe to eat.
Understanding Temperature Controls
Most warming drawers have a simple dial or digital control panel. The typical temperature range is 170 to 200 degrees Fahrenheit. Some models offer even lower settings for delicate tasks like proofing or warming chocolate.
Here is a quick reference for common warming drawer uses:
- 170 degrees Fahrenheit: Ideal for keeping already-cooked meals warm. This is the safest and most common setting.
- 180 to 190 degrees Fahrenheit: Great for warming plates and bread. Also works well for slow-cooking side dishes.
- 200 degrees Fahrenheit: Use for faster warming or in cold environments. Monitor food closely to prevent drying.
Always check your oven manual for the specific temperature range of your warming drawer. Not all models are the same, and the manufacturer knows best.
How Long to Keep Food in the Warming Drawer
The warming drawer is designed for short-term warming, not long-term cooking. Most foods stay at their best quality for one to two hours inside the drawer. Beyond that, the texture and flavor may start to decline.
For food safety, do not leave cooked food in the warming drawer for more than four hours. Bacteria can grow when food sits in the danger zone between 40 and 140 degrees Fahrenheit. If you need to keep food warm for longer, consider using a slow cooker or an insulated carrier instead.
A good rule of thumb is to check your food every 30 minutes. Stir soups and sauces to prevent a skin from forming. Cover dishes with foil if they seem to be drying out. These small steps make a huge difference in the final result.
Common Mistakes and How to Avoid Them
Even experienced cooks sometimes make mistakes when using the warming drawer. The good news is that most of these errors are easy to avoid with a little knowledge.
Mistake 1: Overloading the Drawer
It is tempting to fit as many dishes as possible into the warming drawer. But cramming too much inside blocks airflow and leads to uneven heating. Leave some space between dishes so heat can circulate freely. If you have a lot of food to keep warm, consider using multiple batches rather than overfilling the drawer.
Overloading also puts extra strain on the heating element. Over time, this can reduce the lifespan of your warming drawer. Treat it with care, and it will serve you well for years.
Mistake 2: Using the Wrong Containers
Not every dish is safe for the warming drawer. Plastic containers will melt at warming temperatures. Paper plates can burn or catch fire. And glass dishes that are not labeled oven-safe may crack from the heat.
Always double-check that your containers are oven-safe before placing them in the warming drawer. When in doubt, use ceramic or metal dishes. These materials handle the low heat of the warming drawer without any issues.
Mistake 3: Forgetting to Preheat
Some people toss food into the warming drawer without preheating it first. While the drawer does not need to preheat as long as the main oven does, giving it a few minutes to reach the target temperature helps. Preheating ensures your food starts warming immediately rather than sitting in a cold drawer.
Set the temperature five to ten minutes before you plan to use the drawer. This small habit makes your warming drawer much more effective.
Mistake 4: Covering Dishes Too Tightly
Covering food with a lid or foil can keep it warm, but a tight seal traps steam. Too much moisture makes food soggy and can create condensation inside the drawer. Use a loose cover or leave dishes slightly uncovered to allow steam to escape. You will get better results with less moisture buildup.
Cleaning, Maintenance, and Pro Tips
Taking care of your warming drawer is simple but important. Regular maintenance keeps it working efficiently and extends its lifespan. Here is everything you need to know about cleaning and getting the best results from your warming drawer.
How to Clean the Warming Drawer
Food spills and splatters are inevitable. When they happen, clean them up promptly to prevent sticky residue and odors. Here is a simple cleaning routine for your warming drawer:
- Wait for the drawer to cool down completely. Never clean a hot warming drawer. Allow it to return to room temperature first.
- Remove the drawer if possible. Many models slide out fully for easy cleaning. Check your manual to see if yours can be removed.
- Wipe the interior with a damp cloth. Use warm water and a mild dish soap. Avoid abrasive cleaners or scouring pads that can scratch the surface.
- Clean the heating element gently. Use a soft brush or cloth to remove any food debris from the heating element. Do not use water directly on the element.
- Dry everything thoroughly before reinserting. Moisture left inside the drawer can cause rust or affect performance.
A quick wipe-down after each use makes deep cleaning much easier. When you stay on top of spills, your warming drawer stays looking and working like new.
Expert Tips for Better Results
Here are some pro tips that will help you get the most from your warming drawer:
- Use a thermometer: Place a small oven thermometer inside the drawer to check the actual temperature. Most warming drawers are accurate, but a quick check never hurts.
- Rotate dishes halfway through: If you are warming multiple dishes, rotate them for even heat exposure. This prevents hot spots and cold zones.
- Add moisture when needed: A small splash of water or broth to sauces and gravies before warming helps maintain the right consistency.
- Pair with meal prep: Use the warming drawer as part of your weekly meal prep routine. Warm up individual portions throughout the week without firing up the full oven.
- Keep the drawer slightly open for ventilation: If you notice steam building up, crack the drawer open a little. This allows excess moisture to escape and keeps food from getting soggy.
These small adjustments can take your warming drawer game from basic to expert level. You will notice the difference in the quality and consistency of your warmed dishes.
Warming Drawer vs. Other Warming Methods
The warming drawer is not the only way to keep food warm. Let us compare it to a few common alternatives so you can see why it stands out.
A countertop warmer or warming tray works similarly but sits on your kitchen counter. These are great for buffet-style serving. However, they take up valuable counter space and usually warm only one dish at a time. The warming drawer keeps your counter free and can hold multiple dishes at once.
A slow cooker is another popular option for keeping food warm. Slow cookers are excellent for long cooking times, but they are not as precise as a warming drawer for short-term warming. The warming drawer heats up faster and uses less energy than running a slow cooker all day.
Some people also use the oven itself on a low setting to keep food warm. While this works, it uses significantly more energy than the warming drawer. The drawer is designed specifically for this purpose and operates at a fraction of the power consumption. For everyday use, the warming drawer is the most efficient and convenient choice.
Frequently Asked Questions
Can you use the warming drawer to cook food?
The warming drawer is designed to keep food warm, not to cook raw ingredients. However, some people use it for very slow cooking tasks like warming soups or melting butter. It is not meant to replace your oven or stove for actual cooking. Stick to warming pre-cooked food for the best results and food safety.
What temperature should the warming drawer be set to?
Most warming drawers work best between 170 and 200 degrees Fahrenheit. For keeping cooked meals warm, 170 degrees is ideal. For warming plates or bread, you can go up to 190 degrees. Always refer to your oven manual for the recommended temperature range for your specific model.
Can you put aluminum foil in the warming drawer?
Yes, aluminum foil is safe to use in the warming drawer. It helps retain moisture and prevents food from drying out. Just make sure the foil does not touch the heating element directly. Loose coverage works better than tight wrapping to avoid trapping too much steam.
Is the warming drawer the same as a storage drawer?
No, they are completely different. A warming drawer generates heat to keep food warm. A storage drawer is a non-heated compartment used for storing pans, trays, or cookware. If your drawer does not have a temperature control or a heating indicator light, it is a storage drawer, not a warming drawer.
Can you proof dough in the warming drawer?
Yes, the warming drawer is excellent for dough proofing. The low, consistent heat creates a warm environment that helps bread dough rise. Keep the temperature below 100 degrees Fahrenheit for best results. Place your covered bowl of dough inside and let it proof for the recommended time in your recipe.
How do you clean a warming drawer?
Wait for the drawer to cool completely, then wipe the interior with a damp cloth and mild soap. Remove any food spills immediately to prevent buildup. Avoid using abrasive cleaners or soaking the drawer in water. For stubborn stains, a baking soda paste works gently and effectively. Always dry the drawer thoroughly before using it again.
Conclusion
The warming drawer is a feature that deserves more attention. It is simple to use, incredibly versatile, and a real time-saver in the kitchen. Whether you are keeping dinner warm for your family, preparing a buffet for guests, or proofing bread dough on a cold day, the warming drawer delivers reliable results every time.
Now that you know how to use the warming drawer on an oven, you can start experimenting with confidence. Try different temperature settings, test new dishes, and make it a regular part of your cooking routine. The more you use it, the more you will appreciate how much it simplifies meal preparation and serving.
Remember the key tips from this guide. Use the right containers, keep the temperature in the recommended range, avoid overloading, and clean the drawer regularly. These small habits will ensure your warming drawer works beautifully for years to come. Happy warming!