How To Calibrate An Oven That Is Digital And Save Money
A digital oven can drift out of calibration over time, causing uneven baking and wasted energy. Calibrating a digital oven is a simple fix you can do yourself in minutes, saving money on groceries and repairs. This guide walks you through the exact steps, tools, and tips to get your oven temperature back on target.
You preheat your oven to 350°F, place a cake inside, and wait. But the cake comes out dry on the edges and raw in the middle. Sound familiar? The problem might not be your recipe. It could be your oven temperature.
Most people don’t realize that a digital oven can drift out of calibration over time. This drift can be 25°F or more. That’s the difference between a golden roast and a tough one. Calibrating a digital oven is a quick fix you can do yourself. It saves you money on wasted food and energy bills. You don’t need a repair technician or expensive tools.
In this guide, I’ll show you exactly how to check your oven’s accuracy and fix it. We’ll cover the tools you need, the step-by-step process, and how to keep your oven running true for years. Let’s get your kitchen back on track.
Key Takeaways
- Save Money: A properly calibrated oven uses less energy and prevents food waste, cutting your utility bills.
- Easy DIY Fix: You don’t need a technician; a simple oven thermometer and a screwdriver are all you need.
- Better Baking: Accurate temperature means consistent cookies, bread, and roasts every time.
- Quick Process: Most digital ovens can be calibrated in under 15 minutes.
- Prevent Damage: Correct calibration reduces strain on heating elements and extends oven life.
- Know Your Model: Different brands have different calibration methods; check your manual first.
📑 Table of Contents
Why Your Digital Oven Loses Calibration
Ovens are not precision instruments out of the box. They shift over time. Understanding why helps you prevent big problems later.
The Science Behind Oven Temperature Drift
Every oven has a thermostat and a temperature sensor. The sensor reads the heat and tells the oven when to turn off. Over months of use, the sensor can wear out. It might read low when the actual temperature is high. Or it might read high when things are cool. This mismatch causes your food to cook incorrectly.
Several factors speed up this drift. Frequent self-cleaning cycles heat the oven to extreme temperatures. Grease and food bits build up on the sensor. Even the age of the oven matters. A five-year-old oven is much more likely to need a calibration check than a new one.
Signs Your Oven Needs Calibration
You don’t need a fancy gadget to suspect a problem. Watch for these clues:
- Food cooks unevenly. The top is burnt, but the bottom is raw.
- Baking takes way too long. A recipe that says 30 minutes takes an hour.
- You always adjust recipes. You lower the temperature by 25°F every time.
- The oven doesn’t hold steady. The temperature swings up and down wildly.
- You see error codes. Some digital ovens show an error like F1 or E2 when the sensor fails.
If you notice any of these, it’s time to test your oven. The next section will show you how.
How To Calibrate An Oven That Is Digital
This is the core of the process. How to calibrate an oven that is digital starts with knowing your oven’s current offset. Then you adjust it. The exact steps vary by brand, but the principle is the same.
What You’ll Need Before You Start
Gather these items before you open the oven door:
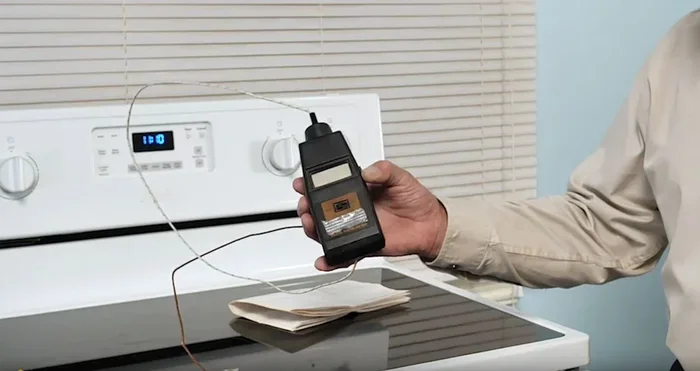
- An oven thermometer. Get a reliable analog or digital oven thermometer. I recommend a dial thermometer with a hanging hook. It costs under $15.
- A screwdriver. Most calibration screws are small Phillips or flat-head screws behind the temperature knob.
- Your oven manual. Search for the model number online if you lost the paper. Manuals often have a calibration section.
- A notepad. You’ll record temperatures as you go.
Step-by-Step Calibration Process
Follow these steps carefully. The whole process takes about 15 minutes.
- Place the thermometer in the center. Put the oven thermometer on the middle rack. Make sure it’s not touching the oven walls.
- Preheat to 350°F. Close the door and let the oven fully preheat. Wait until the oven beeps or the light turns off. This means it has reached the set temperature.
- Read the thermometer. Open the door quickly and check the thermometer. Write down the number. A perfectly calibrated oven will read exactly 350°F. Most ovens read within 10°F of that.
- Check at multiple temperatures. For a more accurate picture, repeat this at 250°F and 400°F. This helps you see if the error is consistent or changes with heat.
- Find the calibration screw. Turn off the oven and unplug it. Remove the temperature knob. Look behind it for a small screw. It often has a plastic cap.
- Adjust the screw. Turn the screw clockwise to increase the temperature. Turn it counterclockwise to decrease it. Move it in tiny increments—about 1/8 of a turn at a time.
- Re-test. Plug the oven back in, preheat to 350°F, and check the thermometer again. Repeat until the thermometer matches the set temperature within 5°F.
That’s it. You’ve just learned how to calibrate an oven that is digital without calling a repairman. The next section covers common mistakes that trip people up.
Common Calibration Mistakes and How to Avoid Them
Even with the right steps, it’s easy to mess up. Here are the pitfalls I see most often.
Using the Wrong Thermometer
Never use a meat thermometer for oven calibration. Meat thermometers are designed for quick reads and high heat, but they aren’t precise at steady oven temperatures. They can be off by 10°F or more. Buy a dedicated oven thermometer. Look for one that says “oven safe” on the package. A good oven thermometer gives you a reliable baseline.
Skipping the Preheating Step
Some people set the oven to 350°F and immediately check the thermometer. That’s wrong. The oven needs time to stabilize. Always wait until the oven signals it’s fully preheated. If you check too early, you’ll get a false low reading and adjust the calibration in the wrong direction.
Turning the Screw Too Far
The calibration screw is very sensitive. One full turn can change the temperature by 30°F or more. Make tiny adjustments. After each tiny turn, reheat and recheck. Patience is your best friend here.
Ignoring the Oven Sensor
The temperature sensor is a metal probe usually located at the back wall of the oven. If it’s coated in grease, it can’t read accurately. Before you adjust the screw, clean the sensor gently with a damp cloth. A dirty sensor will throw off your calibration no matter how much you tweak the screw.
Quick Tip
Keep a small brush near your oven. Every month, gently brush the inside walls and the sensor area to prevent grease buildup. This simple habit keeps your oven calibration accurate longer.
Quick Tips for Maintaining Oven Accuracy
Calibration isn’t a one-time fix. Ovens drift again over months. Here’s how to stay ahead.
- Recalibrate every 6 months. Set a reminder on your phone. A quick check twice a year keeps your baking consistent.
- Avoid slamming the door. Heavy impacts can jostle the sensor and loosen connections.
- Use the convection setting wisely. Convection ovens circulate hot air, which can mask a calibration issue. Test with the convection off first.
- Keep the oven level. An unlevel oven can cause hot spots that mimic calibration problems. Use a bubble level on the oven floor to check.
- Replace worn gaskets. A torn door seal lets heat escape. The oven then works harder and may show incorrect readings.
Expert Insight
“Many homeowners ignore a 20°F oven error for years,” says appliance repair technician Maria Lopez. “That’s like driving with your gas gauge broken. You waste fuel and you never know how much you have left. A simple oven thermometer takes the guesswork out of cooking.”
Comparison: Analog vs. Digital Oven Thermometers
Choosing the right thermometer matters. Here’s a quick side-by-side look at the two main types.
| Feature | Analog Dial Thermometer | Digital Probe Thermometer |
|---|---|---|
| Price Range | $10 – $20 | $15 – $30 |
| Accuracy | ±5°F to ±10°F | ±1°F to ±3°F |
| Reading Speed | Slow (2-3 minutes) | Fast (10-30 seconds) |
| Battery Required | No | Yes |
| Best For | Quick oven checks | Precision baking and roasting |
| Durability | Very durable, no electronics | Fragile probe, needs care |
For most home cooks, an analog dial thermometer works perfectly. It has no batteries to die and it’s hard to break. If you bake professionally or you love precision, a digital probe gives you faster, more exact readings. Both tools serve the same purpose: telling you the truth about your oven’s temperature.
When to Call a Professional
DIY calibration fixes 90% of oven temperature problems. But sometimes, the issue is deeper than a simple offset.
Recognizing Hardware Problems
Watch for these warning signs that point to a hardware fault:
- The oven reads 50°F or more off. A calibration screw can’t fix a broken sensor.
- The temperature fluctuates wildly. If it swings 100°F in seconds, the thermostat may be failing.
- Error codes keep returning. If you clear an F1 code and it comes back immediately, the control board likely needs replacement.
- The oven doesn’t heat at all. This is usually a heating element or igniter issue, not a calibration problem.
Cost vs. DIY Repair
A service call can cost $100 to $200 just for the visit. The part itself might be $50 to $150. But if your oven is over 10 years old, a new oven might be more cost-effective. Consider the age of your appliance before you spend big on repairs. A calibration fix costs you nothing but 15 minutes of your time. A new digital oven can save energy and give you better oven temperature control from day one.
Conclusion: Enjoy Perfectly Baked Goods Again
Your oven is one of the most used appliances in your home. It deserves a little attention now and then. How to calibrate an oven that is digital is not just a repair trick. It’s a way to take control of your cooking. You’ll waste less food, save on energy, and enjoy meals that turn out exactly as you planned.
Grab a thermometer, find that calibration screw, and spend 15 minutes on the process. The results will surprise you. Your cookies will be chewy in the center and golden on the edges. Your roasts will be juicy and even. Your bread will rise properly. All because you took the time to get the temperature right.
Start today. Your wallet and your taste buds will thank you.
Frequently Asked Questions
Can I calibrate a digital oven without a thermometer?
No, a thermometer is essential. You need an independent tool to measure the actual oven temperature. Without it, you’re just guessing, and guessing can lead to over- or under-correction. A basic oven thermometer costs very little and gives you reliable results.
How often should I check my oven calibration?
Check it every six months. If you use your oven daily or you do a lot of self-cleaning cycles, check it every three months. Frequent high-heat use wears out the sensor faster. A quick monthly check when you’re baking a lot is also a good habit.
What if my oven still shows an error code after calibration?
The error code likely points to a hardware fault, not a calibration offset. Common codes like F1 or E1 usually mean the temperature sensor or control board has failed. Cleaning the sensor and checking the wiring might help, but you may need a professional repair or a replacement part.
Does calibrating the oven save money on electricity?
Yes, it does. An oven that runs 25°F too hot cooks food faster but wastes energy. It also over-bakes the outside while the inside stays underdone. You end up re-cooking or throwing away food. A properly calibrated oven heats to the exact temperature you set, using only the energy it needs.
Can I calibrate a convection oven the same way?
Yes, the process is identical. However, convection ovens have a fan that circulates air, which can make temperature readings slightly different. Turn off the convection fan during calibration for the most accurate baseline reading. Then you can adjust the calibration offset to account for the fan’s effect.
Is it safe to adjust the calibration screw myself?
It is completely safe as long as you unplug the oven first. The screw is a simple mechanical adjustment. You won’t touch any electrical wires. Just work carefully, make small turns, and re-test after each adjustment. If you feel unsure, your oven manual often has a diagram showing the exact location of the screw.