How Long To Cook Carnitas In A Dutch Oven Perfectly
The how long to cook carnitas in a Dutch oven question is answered here with foolproof times and temperatures. You’ll learn the ideal low-and-slow method that yields fall-apart, juicy pork shoulder every time. This guide covers everything from seasoning to serving, so you can master Dutch oven carnitas with confidence.
The secret to amazing carnitas lies in patience and the right pot. A Dutch oven transforms humble pork shoulder into tender, juicy perfection. So how long to cook carnitas in a Dutch oven? The answer depends on your oven temperature and the cut you choose. This guide will walk you through every step, from seasoning to serving. You’ll learn the exact times, temperatures, and techniques that guarantee fall-apart meat every single time.
Many home cooks fear the long cooking time, but that’s exactly what makes carnitas special. The low heat gently breaks down the connective tissue in the pork. The result is meat so tender it practically melts. Whether you’re feeding a crowd or meal prepping for the week, a Dutch oven gives you consistent, hands-off results. Let’s dive into everything you need to know.
Key Takeaways
- Low and slow is the secret: Cooking carnitas at 300–325°F for 3–4 hours gives you the most tender, juicy meat.
- Bone-in pork shoulder works best: It adds rich flavor and stays moist throughout the long braise.
- Sear before you braise: A hard sear on all sides builds a deep, savory crust that defines great carnitas.
- Use a simple braising liquid: Stock, citrus, and spices create a fragrant cooking medium without overpowering the pork.
- Crisping is the final step: Broiling or pan-frying the shredded meat gives you those coveted crispy edges.
- Rest the meat before shredding: Letting it sit in its juices keeps the meat succulent and easy to pull apart.
- Store and reheat properly: Carnitas keep well in the fridge and reheat beautifully in a skillet with a little liquid.
📑 Table of Contents
Why a Dutch Oven Is Perfect for Carnitas
A Dutch oven is the gold standard for braising pork. Its heavy lid traps moisture and circulates heat evenly. This creates a self-basting environment that keeps the meat succulent. Unlike a slow cooker, a Dutch oven lets you sear the meat on the stovetop first. That sear adds a layer of flavor you simply cannot get from a countertop appliance.
The Magic of Even Heat
Cast iron and enameled steel distribute warmth uniformly. There are no hot spots that can dry out your pork. The thick walls also hold steady temperatures, which is crucial for low-and-slow cooking. When you ask how long to cook carnitas in a Dutch oven, you are really asking about the ideal environment for collagen to melt into gelatin. That transformation takes time, and the Dutch oven delivers it perfectly.
Dutch Oven vs. Slow Cooker for Carnitas
A slow cooker works too, but it lacks the ability to sear. It also tends to steam rather than braise, which can leave the meat a bit soft. A Dutch oven gives you crispy edges after shredding. It also lets you reduce the braising liquid into a rich, concentrated sauce right in the pot. Many carnitas recipes call for this stovetop-to-oven workflow because it builds deeper flavor.
Choosing the Right Pork Cut
The cut you pick sets the stage for your entire cook. Not all pork works equally well for long braises. You want a cut with plenty of connective tissue and intramuscular fat. That’s what melts into juicy, flavorful meat over several hours.
Pork Shoulder vs. Boston Butt
Pork shoulder and Boston butt are essentially the same cut, just from different parts of the shoulder. Both are perfect for carnitas. They contain enough fat to stay moist during the long cook. Look for a piece that is well-marbled with creamy white fat streaks. Avoid very lean cuts, because they will dry out and become tough.
Bone-In vs. Boneless Pork Shoulder
Bone-in pork shoulder adds extra flavor to the braising liquid. The bone releases gelatin as it cooks, giving the sauce a silky body. Boneless pieces cook a bit faster and are easier to shred. Both work beautifully. A 4–5 pound bone-in shoulder is ideal for most families. It yields about 3 cups of shredded meat after cooking.
How Much Pork Do You Need?
Plan on about 1/3 pound of raw pork shoulder per person. The meat shrinks as it cooks, so a 4-pound piece feeds roughly 8–10 people generously. If you are making tacos or burritos, count on each guest having 3–4 tacos. Buying a larger piece also gives you leftovers for sandwiches or salads the next day.
How Long to Cook Carnitas in a Dutch Oven
The time it takes to cook carnitas depends on three things: oven temperature, size of the pork, and whether it is bone-in. The general rule is low and slow. How long to cook carnitas in a Dutch oven at 300°F is usually 3.5 to 4 hours. At 325°F, it drops to about 3 to 3.5 hours. Higher temperatures speed things up but can dry out the meat if you are not careful.
The Ideal Temperature and Time
For the most tender results, set your oven to 300°F or 325°F. This gentle heat allows the pork to braise slowly without toughening the muscle fibers. A 4-pound bone-in shoulder at 325°F will be perfectly done in about 3 hours. Check the internal temperature with a meat thermometer. You want it to reach 195–205°F. At that point, the collagen has fully broken down, and the meat will pull apart effortlessly.
Quick Comparison Table: 300°F vs. 325°F vs. 350°F
| Oven Temperature | Approximate Cooking Time | Result |
|---|---|---|
| 300°F | 3.5–4 hours | Most tender, very moist, minimal evaporation |
| 325°F | 3–3.5 hours | Balanced tenderness and flavor development |
| 350°F | 2.5–3 hours | Faster, but slightly less succulent; watch closely |
As you can see, lower temperatures give you more forgiveness. If you are new to Dutch oven cooking, stick with 325°F. It offers a great balance of time and texture.
How to Tell When Carnitas Are Done
Do not rely solely on the clock. Use a meat thermometer to check the internal temperature. The pork should read at least 195°F for shreddable tenderness. You can also test it with a fork. If the tines slide in easily and the meat falls apart with gentle pressure, it is done. The exterior should be a deep, mahogany brown. The juices should run clear, not pink.
Step-by-Step Dutch Oven Carnitas Recipe
Now that you know the time and temperature, let’s walk through the actual cooking process. This simple carnitas recipe uses pantry staples and delivers restaurant-quality results.
Seasoning and Searing
Start by patting the pork dry with paper towels. This helps the skin get crispy. Rub the entire piece with salt, black pepper, garlic powder, cumin, and a little oregano. Let it sit at room temperature for 30 minutes. That small rest allows the seasoning to penetrate the meat. Next, heat a few tablespoons of lard or oil in your Dutch oven over medium-high heat. Sear the pork on all sides until you get a rich brown crust. This step locks in juices and adds flavor to the braising liquid.
The Braising Liquid and Aromatics
After searing, remove the pork and set it aside. In the same pot, add diced onions, minced garlic, and orange slices. Cook for a few minutes until they soften. Pour in chicken stock and a splash of orange juice or lime juice. Add a bay leaf and a cinnamon stick if you like. Stir to scrape up the browned bits from the bottom. Those bits are pure flavor. Place the seared pork back in, fat side up. The liquid should come about halfway up the meat. Cover the pot with its lid and transfer it to the preheated oven.
Shredding and Crisping
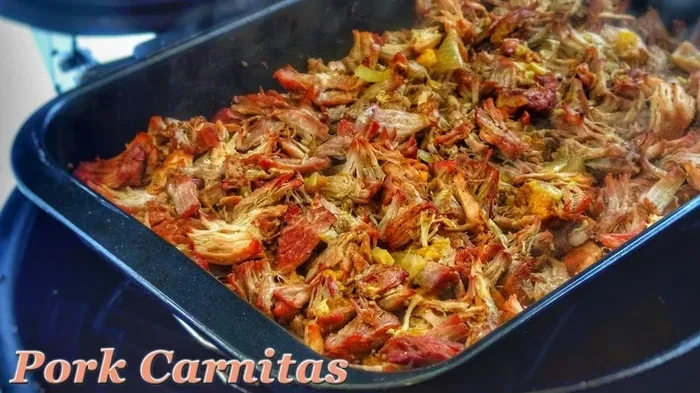
When the pork is done, carefully remove it from the pot. Let it rest on a cutting board for 15–20 minutes. This resting period redistributes the juices. While it rests, strain the braising liquid and skim off the fat. You can reserve the liquid for serving or reduce it into a sauce. Use two forks to pull the pork apart along the grain. For extra crispiness, spread the shredded meat on a sheet pan and broil it for 3–5 minutes. Watch it closely so it does not burn. The edges should turn golden and crunchy.
Pro Tips for Perfect Carnitas
Even with the right time and temperature, a few extra steps can elevate your carnitas from good to outstanding. These quick tips come from years of testing Dutch oven carnitas recipes.
Quick Tips for Juicy Results
- Do not skip the sear: Browning adds a deep, savory flavor that forms the foundation of great carnitas.
- Use bone-in pork: It contributes more gelatin and richness to the cooking liquid.
- Keep the oven door closed: Every time you open the door, you lose heat and moisture. Trust the process.
- Let the meat rest: Resting after cooking keeps the juices locked in, making shredding easier and the meat more moist.
- Broil at the end: A quick broil gives you crispy edges that mimic traditional pan-fried carnitas.
Common Mistakes to Avoid
- Using lean cuts: Lean pork dries out quickly during long cooking. Always choose well-marbled shoulder or butt.
- Cutting the cooking time short: If the meat is not tender enough, it needs more time. Low and slow cannot be rushed.
- Overcrowding the pot: A too-full Dutch oven can trap steam unevenly. Use a pot that fits the pork comfortably with space for liquid.
- Forgetting to skim fat: The rendered fat can make the final dish greasy if you do not remove it before shredding.
- Adding dairy too early: Cream or cheese-based toppings should go on after cooking. Adding them during the braise can cause curdling.
Expert Insights from Professional Chefs
“The biggest secret to incredible carnitas is patience. I always tell home cooks to resist the urge to raise the temperature. The low-and-slow method is non-negotiable if you want that perfect, melt-in-your-mouth texture. Let the pork do its thing, and you will be rewarded every time.” — Chef Maria Gonzalez, Mexican Cuisine Specialist
Another expert tip is to add a small amount of orange zest to the braising liquid. The citrus oils infuse the pork with a bright, aromatic note that cuts through the richness. This is a common trick in traditional Mexican pulled pork preparations. It adds complexity without making the dish taste overtly fruity.
Serving and Storing Your Carnitas
Once your carnitas are cooked and shredded, it is time to think about serving and leftovers. Carnitas are incredibly versatile, and proper storage ensures you can enjoy them for days.
Best Toppings and Sides
Serve your carnitas in warm corn tortillas with fresh cilantro, diced onions, and a squeeze of lime. Pickled red onions add a tangy crunch. For a heartier meal, pair them with Mexican street corn, black beans, or a simple cabbage slaw. A drizzle of your reserved braising liquid over the top adds extra moisture and flavor. Fresh salsa verde or a creamy guacamole are also perfect companions.
How to Store and Reheat Leftovers
Let the carnitas cool completely before storing. Place them in an airtight container and refrigerate for up to 4 days. To reheat, add a splash of chicken stock or water to a skillet over medium heat. Spread the shredded pork in the pan, cover, and let it warm through for 5–8 minutes. This prevents the meat from drying out. You can also reheat carnitas in the microwave, but the skillet method gives you better texture. For longer storage, freeze the cooked pork in a freezer-safe bag for up to 3 months.
Final Thoughts on Dutch Oven Carnitas
Mastering how long to cook carnitas in a Dutch oven is easier than you think. The key is to give the pork enough time at a low temperature to break down all the tough connective tissue. A Dutch oven makes this process effortless. It provides the steady, even heat that transforms a simple pork shoulder into a show-stopping centerpiece. You will love the rich, deep flavor and the tender, juicy texture that comes from this method.
Once you try this approach, you will never go back to rushed weeknight versions. The aroma that fills your kitchen while the pork braises is simply irresistible. Invite friends over, set out warm tortillas and toppings, and watch everyone enjoy the fruits of your patience. Dutch oven carnitas are the ultimate comfort food, and now you have all the tools to make them perfectly every time.
Frequently Asked Questions
Can I cook carnitas in a Dutch oven on the stovetop instead of the oven?
Yes, you can braise carnitas on the stovetop at a very low simmer. However, the oven provides more even heat distribution, which reduces the risk of scorching. If you choose the stovetop method, use a heat diffuser and check the liquid level every hour to prevent drying out.
What is the best pork cut for carnitas in a Dutch oven?
Pork shoulder or Boston butt is the best choice. These cuts have the perfect balance of fat and connective tissue. They become incredibly tender after long braising and hold together well when shredded. Bone-in pieces add extra flavor to the cooking liquid.
How long does it take to cook carnitas at 300°F?
At 300°F, a 4-pound bone-in pork shoulder takes about 3.5 to 4 hours. The lower temperature ensures the meat stays juicy and the collagen breaks down completely. Always use a meat thermometer to confirm the internal temperature reaches 195–205°F for the most tender result.
Can I use a slow cooker instead of a Dutch oven for carnitas?
You can, but a Dutch oven gives you the advantage of searing the meat first, which builds a deeper flavor. Slow cookers steam the meat rather than braise it, which can result in a softer texture. If you use a slow cooker, you may want to finish the shredded meat under the broiler for crispy edges.
How do I get crispy carnitas after braising?
Spread the shredded pork on a sheet pan in a single layer. Drizzle with a little of the reserved braising liquid or oil. Broil on high for 3–5 minutes, watching closely, until the edges are golden and crispy. You can also pan-fry the shredded meat in a hot skillet with a small amount of lard for a similar effect.
How do I store leftover carnitas and how long do they last?
Store cooked carnitas in an airtight container in the refrigerator for up to 4 days. For longer storage, freeze them in a freezer-safe bag for up to 3 months. Reheat gently in a skillet with a splash of stock to keep the meat moist and tender.