How To Sanitize A Coffee Maker For Better Tasting Brew
Sanitizing your coffee maker regularly is essential for removing mineral buildup, bacteria, and coffee residue that affect brew quality. Whether you use vinegar, baking soda, or commercial cleaners, this guide walks you through every method so your coffee tastes fresh and clean. A clean coffee maker means better coffee, longer equipment life, and healthier morning routines.
Key Takeaways
- Regular sanitizing removes mineral buildup and prevents bitter coffee taste caused by calcium deposits inside your machine.
- Vinegar and water is the most popular DIY method for deep cleaning your coffee maker safely and affordably.
- Baking soda offers a gentle alternative that tackles odors and light residue without harsh chemicals.
- Commercial cleaners work fast when you need a powerful solution for heavy mineral buildup or stubborn coffee residue.
- Daily maintenance habits prevent problems and keep your coffee machine hygiene at its best between deep cleans.
- A sanitized coffee maker brews better tasting coffee and lasts significantly longer than one that is neglected.
📑 Table of Contents
- Why Sanitizing Your Coffee Maker Matters
- How Often Should You Sanitize Your Coffee Maker?
- How To Sanitize A Coffee Maker With Vinegar And Water
- How To Sanitize A Coffee Maker With Baking Soda
- How To Sanitize A Coffee Maker With Commercial Cleaners
- How To Maintain A Clean Coffee Maker Long-Term
- Conclusion
Why Sanitizing Your Coffee Maker Matters
Many coffee lovers focus on buying the best beans and perfecting their brewing technique. But there is one step that often gets overlooked: sanitizing your coffee maker. Over time, mineral deposits, coffee oil residue, and bacteria build up inside your machine. This affects the flavor of every cup you pour.
Think about it. You would never brew coffee in a dirty pot. So why let the inside of your machine get neglected? Coffee maker upkeep is just as important as the beans you use. A clean coffee maker delivers better brewing quality and keeps your morning routine healthy and enjoyable.
Regular coffee machine maintenance also extends the life of your equipment. Mineral buildup from hard water can damage heating elements and clog tubes. By taking a few minutes each month to descale your coffee maker, you save money on replacements and enjoy better coffee maker care every single day. A little prevention goes a long way toward avoiding costly repairs or early replacement.
What Happens When You Skip Cleaning
Ignoring your coffee machine hygiene leads to several problems that compound over time. First, calcium deposits accumulate inside the water reservoir and heating tube. These deposits restrict water flow and create uneven brewing temperatures. The result is a bitter coffee taste that no amount of good beans can fix.
Second, coffee oils go rancid over time. These oils coat the interior surfaces and create a stale coffee maker smell that lingers even after you brew a fresh pot. Third, bacteria and mold can grow in the warm, moist environment inside your machine. This is especially true if you leave coffee sitting in the carafe overnight or skip rinsing after each use.
To tackle tough residue from other kitchen appliances, you might also want to check out how to clean oven with burnt food using similar deep cleaning principles. The same attention to detail that removes baked-on oven grime applies to your coffee maker too. Treating residue early prevents it from becoming a hardened problem that requires multiple cleaning cycles to resolve.
How Often Should You Sanitize Your Coffee Maker?
The frequency of sanitizing your coffee maker depends on how often you use it and the water quality in your area. Hard water regions demand more frequent cleaning because minerals accumulate faster. Here is a simple breakdown to help you stay on track with your coffee machine maintenance routine.
Daily Care Habits
After every brew, dump the used grounds and rinse the carafe with warm water. Give the filter basket a quick shake and rinse it out as well. These small habits prevent coffee residue from building up and make your monthly deep clean much easier. Rinsing takes less than a minute but sets the foundation for long-term coffee maker care.
Weekly Maintenance
Once a week, wash the carafe, filter basket, and lid with warm soapy water. Dry all parts thoroughly before reassembling them. This simple routine keeps coffee machine hygiene at a high level and prevents mold growth in hard-to-reach spots. Pay special attention to the rim of the carafe where residue often collects and hardens over time.
Monthly Deep Clean
Once a month, run a full descale coffee maker cycle using vinegar, baking soda, or a commercial cleaner. This removes mineral buildup that daily rinsing cannot touch. If you live in a hard water area or use your machine multiple times per day, consider cleaning every two weeks instead of once a month.
Quick Tip: Set a recurring reminder on your phone for monthly coffee maker cleaning. It takes less than 30 minutes and makes a huge difference in taste. Pair it with another routine task like changing your furnace filter so you never forget.
How To Sanitize A Coffee Maker With Vinegar And Water
The vinegar and water method is the most popular way to sanitize a coffee maker at home. White distilled vinegar is a natural acid that dissolves mineral deposits and kills bacteria effectively. It is cheap, readily available, and safe for most coffee machines. This approach is the go-to choice for deep clean coffee machine routines across the country.
What You Need
- White distilled vinegar
- Cold filtered water
- A clean sponge or soft cloth
- Your coffee maker user manual (optional but helpful)
Step-By-Step Process
Step 1: Mix the solution. Fill the water reservoir with equal parts vinegar and water. For a standard 12-cup coffee maker, use 6 cups of vinegar and 6 cups of water. This ratio works for most machines and creates a powerful coffee maker cleaning solution that breaks down buildup effectively.
Step 2: Run a half brew cycle. Turn on your machine and let it run for about half the cycle. Then turn it off and let the solution sit for 30 to 60 minutes. This soaking time allows the vinegar to break down calcium deposits and loosen coffee residue clinging to the interior walls and tubes.
Step 3: Complete the cycle. Turn the machine back on and let it finish brewing. The vinegar solution will run through the tubes and out the spout. Do not drink this coffee. Discard it after the cycle completes. The acidic solution has done its job dissolving mineral deposits and sanitizing the internal components.
Step 4: Rinse thoroughly. Run two to three full cycles with fresh cold water only. This removes any vinegar taste and smell. Taste the water from each rinse cycle. When it smells and tastes completely neutral, your machine is ready to brew your next pot of coffee.
Tips For Best Results With Vinegar
- Use white distilled vinegar, not apple cider vinegar. The latter contains sugars that can leave residue inside your machine.
- If the vinegar smell lingers after rinsing, add a teaspoon of baking soda to the final rinse cycle to neutralize it.
- For heavy buildup, let the vinegar solution sit for up to two hours before running the brew cycle.
- Never mix vinegar with commercial cleaning products. This can create harmful chemical reactions that damage your machine.
- Run a plain water cycle after vinegar cleaning even if you think the smell is gone. Extra rinsing never hurts.
Expert Insight: According to coffee equipment manufacturers, vinegar cleaning should be done at least once a month for machines used daily. Some brands even recommend it every two weeks in hard water areas. Always check your machine manual before using acidic cleaners, especially if your coffee maker has a built-in water filter or special coating that could be affected by prolonged acid exposure.
How To Sanitize A Coffee Maker With Baking Soda
If you prefer a gentler approach, baking soda is an excellent alternative. It is a mild alkali that neutralizes acids, absorbs odors, and lifts light stains from interior surfaces. Baking soda is perfect for coffee maker upkeep between deeper vinegar cleans. It is also a great option if the smell of vinegar puts you off.
Making The Baking Soda Solution
Add one tablespoon of baking soda to the water reservoir. Fill it with warm water to the maximum line. Stir gently to dissolve the powder completely. The solution will look slightly cloudy, and that is perfectly normal. The baking soda works by lifting coffee residue from the interior surfaces and neutralizing any stale odors trapped inside the machine.
Running The Cleaning Cycle
Turn on your coffee maker and let the baking soda solution run through a full brew cycle. The solution will pass through the tubes and out the spoute. Baking soda works by lifting stains and residue from the interior surfaces and neutralizing any stale odors that have developed over time.
After the cycle completes, run two full rinse cycles with fresh water. Taste the water from the final rinse to make sure no baking soda flavor remains. A faint taste means you need one more rinse cycle before brewing your next pot of coffee.
Common Mistake: Using too much baking soda can leave a white film inside your machine. Stick to one tablespoon per cleaning cycle. If you notice residue after rinsing, run an extra rinse cycle with plain water until the film disappears completely.
Baking soda is also great for cleaning the carafe and filter basket by hand. Make a paste with a little water, apply it to stained areas, and scrub gently with a soft sponge. This approach works well for deep clean coffee machine tasks without the strong smell of vinegar. It is especially effective on the carafe rim and the filter basket where coffee oils tend to accumulate.
Quick Tip: For stubborn odors, add a tablespoon of baking soda to the water reservoir and let it sit overnight before running a cycle. This gives the baking soda extra time to absorb unpleasant smells that have settled deep inside the machine. This method works wonders on machines that have been neglected for several months.
How To Sanitize A Coffee Maker With Commercial Cleaners
Commercial coffee maker cleaners offer a convenient and powerful option for sanitizing your coffee maker. These products are specifically formulated to dissolve mineral deposits, remove coffee oils, and kill bacteria effectively. They are widely available at grocery stores, online retailers, and home goods shops. Popular brands include Urnex Dezcal, Keurig Descaling Solution, and Durgol Swiss Espresso.
Choosing The Right Product
When selecting a coffee maker cleaning solution, look for products designed specifically for coffee machines. Check the label for these important features:
- Non-toxic and food-safe ingredients
- Safe for all coffee maker types including drip, pod, and espresso machines
- No strong chemical aftertaste that could affect your brew
- Biodegradable formula when possible for environmentally conscious cleaning
Avoid generic household cleaners that are not designed for food contact surfaces. These can leave harmful residues that end up in your coffee. Always choose products that are explicitly labeled as safe for coffee equipment and food preparation surfaces.
Following The Instructions
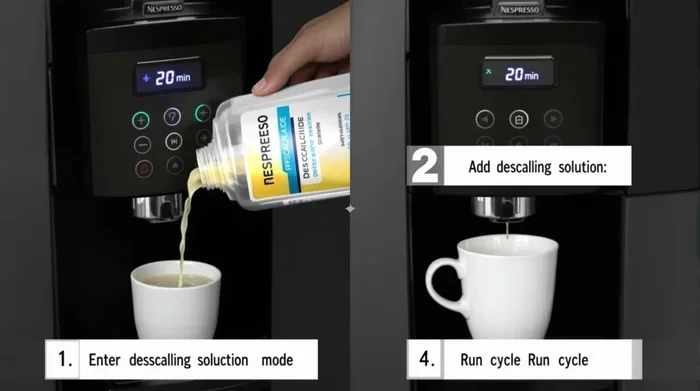
Every commercial cleaner comes with specific directions on the label. Generally, you will add the recommended amount of solution to the water reservoir, run a full brew cycle, and then rinse with fresh water two to three times. The entire process usually takes about 20 minutes total, making commercial cleaners the fastest option for sanitizing your coffee maker.
For a thorough deep clean coffee machine routine, pair your commercial cleaner with a monthly vinegar cycle. This combination tackles both mineral deposits and oily buildup effectively. The vinegar cycle handles mineral dissolution while the commercial cleaner addresses coffee oils and bacteria in one powerful pass.
Expert Insight: If you also maintain other kitchen appliances like an air fryer, consider deep cleaning your Ninja air fryer oven on the same monthly schedule. Keeping all your kitchen appliances on a consistent cleaning routine simplifies maintenance and ensures better cooking and brewing results across the board. A regular schedule makes the work feel less daunting and more like a habit.
How To Maintain A Clean Coffee Maker Long-Term
Sanitizing is just one part of coffee maker care. Long-term coffee machine maintenance requires daily habits and regular attention to all removable components. Consistent care prevents buildup from becoming a serious problem and keeps every cup tasting its best. Here is how to keep your machine in top shape for years of reliable service.
Daily Rinse Habits
After each use, empty the grounds basket and rinse the carafe with warm water. Wipe down the exterior with a damp cloth to remove splashes and fingerprints. These quick habits prevent coffee residue from hardening and reduce the need for deep cleaning sessions. Think of it as a five-minute investment that saves you thirty minutes of scrubbing later.
Never leave wet coffee grounds sitting in the filter basket overnight. They can develop mold and attract insects. Empty the basket into your compost or trash immediately after brewing. This simple habit is one of the most overlooked coffee brewing tips that makes a real difference in daily coffee quality.
Regular Descaling Schedule
Descaling removes mineral deposits that build up over time from heated water. Use vinegar, baking soda, or a commercial descaler every four to six weeks. If you notice slower brewing times, unusual gurgling noises, or water leaking from unexpected places, it is time to descale regardless of your schedule.
Hard water accelerates mineral buildup significantly. If your tap water leaves white crusty deposits on your faucets and showerhead, your coffee maker needs descaling more frequently. Consider using filtered water to slow down this process and improve brewing quality. Filtered water also reduces the need for frequent descaling, saving you time and cleaning supplies.
Proper Storage Between Uses
If you do not use your coffee maker every day, store it with the carafe and lid off. This allows air to circulate and prevents moisture from being trapped inside, which can lead to mold and bacteria growth. Never store the machine with water sitting in the reservoir for extended periods. Empty the reservoir completely and leave the lid open to air dry.
Common Mistake: Many people forget to clean the water filter if their machine has one. A clogged water filter restricts flow and affects brew temperature, leading to inconsistent results. Replace or clean your water filter every two months for best coffee maker care. A clean filter also improves the taste of your coffee by removing impurities from the water before it reaches the brewing chamber.
When To Replace Your Coffee Maker
Even with excellent coffee maker upkeep, machines eventually wear out and lose their effectiveness. Signs that it is time for a replacement include a persistent coffee maker smell that does not go away after cleaning, frequent breakdowns, and consistently poor brewing quality despite regular descaling. A new machine can transform your morning routine and deliver noticeably better flavor with every cup.
Just as you would maintain your kitchen range by knowing how to properly handle tasks like opening your microwave oven safely, maintaining your coffee maker with proper care ensures it serves you well for years. Simple attention to cleaning and storage makes all the difference between a machine that lasts five years and one that lasts fifteen. Treat your coffee maker with the same respect you give any other important kitchen tool.
Conclusion
Sanitizing your coffee maker is one of the simplest ways to improve your daily coffee experience. Whether you choose vinegar, baking soda, or a commercial cleaner, the key is consistency. A regular cleaning routine removes mineral buildup, eliminates harmful bacteria, and prevents stale odors that ruin the flavor of your brew. Taking just thirty minutes a month can transform the taste of every cup you pour.
Start with the method that fits your lifestyle and budget. Vinegar and water is the most affordable and accessible option for most households. Baking soda works well for gentle maintenance between deeper cleans. Commercial cleaners deliver powerful results when you need them most for heavy buildup. Whatever you choose, commit to a monthly schedule and your coffee maker will reward you with better tasting coffee every single morning.
Remember that coffee machine hygiene is not just about taste. It is about your health, equipment longevity, and enjoying every cup to its fullest potential. Take a few minutes today to sanitize your coffee maker and taste the difference in your next brew. Your morning routine will never be the same once you experience what a truly clean machine can produce. Clean coffee makes happy coffee drinkers, and that is a goal worth pursuing every single day.
Frequently Asked Questions
Can I Use Apple Cider Vinegar To Sanitize My Coffee Maker?
It is best to stick with white distilled vinegar. Apple cider vinegar contains sugars and trace compounds that can leave a sticky residue inside your machine. White vinegar is pure acetic acid and breaks down mineral deposits without leaving behind any sweet residue that could affect your next brew or create a breeding ground for bacteria.
How Long Does It Take To Sanitize A Coffee Maker?
The entire process takes about 30 to 45 minutes, including rinse cycles. The soaking phase alone takes 30 to 60 minutes when using vinegar. If you use a commercial cleaner, the active cycle is usually faster, around 20 minutes. However, the rinse cycles are essential and should never be skipped, as leftover cleaning solution can affect the taste of your coffee and potentially be harmful.
Is It Safe To Sanitize A Coffee Maker With Bleach?
No, bleach is not safe for coffee makers. The chemicals can leave behind harmful residues that are dangerous when ingested with your coffee. Bleach can also damage rubber seals, plastic components, and internal tubing. Stick to vinegar, baking soda, or food-safe commercial cleaners for safe and effective sanitizing that protects both your machine and your health.
Can I Put My Coffee Maker Parts In The Dishwasher?
Most coffee maker carafes and filter baskets are dishwasher safe, but always check your manual first. The heating base and electronic components should never be submerged in water or placed in a dishwasher. Hand washing removable parts with warm soapy water is the safest approach for coffee maker care and helps prevent electrical damage or warping of plastic components.
Why Does My Coffee Still Taste Bad After Cleaning?
If your coffee still tastes off after cleaning, the issue may be deeper buildup inside the tubes or heating element. Try running two vinegar cycles in a row with a longer soaking period. Also check your water filter and replace it if needed. Sometimes the problem is old coffee oils that require multiple cleaning cycles to fully remove, especially in machines that have not been cleaned in a long time.
How Do I Know If My Coffee Maker Has Mold?
Signs of mold include a musty smell that does not go away after rinsing, visible dark spots inside the carafe or reservoir, and a slimy film on interior surfaces. If you suspect mold, thoroughly sanitize your machine with vinegar and scrub all removable parts with hot soapy water. Let everything dry completely in open air before reassembling to prevent mold from returning.