How To Use Sculpey Oven Bake Clay A Step By Step Guide
Sculpey oven bake clay is one of the most popular crafting materials for beginners and pros alike. This step-by-step guide walks you through everything from conditioning the clay to baking it to perfection. You will learn the right temperatures, timing, and finishing techniques to create durable, beautiful pieces every time.
Have you ever wanted to create something unique with your own hands? How To Use Sculpey Oven Bake Clay is a question many crafters ask when they first discover this versatile material. Whether you are making jewelry, figurines, or home decor, oven bake clay opens up a world of creative possibilities. The best part? You do not need a studio or expensive equipment to get started.
Sculpey oven bake clay is a type of polymer clay that hardens when heated in a regular home oven. It is soft and pliable before baking, which makes it perfect for sculpting, molding, and shaping. Once baked, it becomes durable and long-lasting. This guide will take you through every step of the process, from preparing your clay to finishing your masterpiece. By the end, you will feel confident enough to start your very first project.
Key Takeaways
- Proper Conditioning Is Essential: Kneading your Sculpey clay before use ensures a smooth, workable texture that prevents cracks after baking.
- Baking Temperature Matters: Always bake at 275°F (130°C) for the best results and to avoid burning or undercooking your piece.
- Use an Oven-Safe Thermometer: Home ovens can run hot or cold, so a reliable thermometer helps you maintain the correct baking temperature.
- Finishing Techniques Add Polish: Sanding, painting, and glazing your baked clay projects elevate the final look and increase durability.
- Safety First: Always bake in a ventilated area and use dedicated baking tools that are not used for food.
- Experiment with Projects: From jewelry to home decor, polymer clay offers endless creative possibilities once you master the basics.
📑 Table of Contents
What Is Sculpey Oven Bake Clay?
Sculpey is a brand of polymer clay that has been around for decades. It is made from PVC particles mixed with plasticizers, which give it its soft, clay-like feel. When you place it in a home oven, the heat causes the materials to bond together, creating a solid and sturdy piece. Unlike air-dry clay, Sculpey does not need time to dry. It bakes quickly and evenly, which makes it ideal for crafting at home.
There are several types of Sculpey clay available. Sculpey III is the most popular choice for beginners because it is soft and easy to work with. Premo is another favorite that offers a firmer texture and vibrant colors. Fimo is known for being slightly harder but holding fine details well. Each type follows the same basic baking principles, so the techniques you learn here apply to all of them.
Why Choose Oven Bake Clay Over Other Types?
Oven bake clay has several advantages over other crafting materials. First, it does not shrink or crack during the baking process. This means your finished piece keeps its shape and size. Second, it comes in a huge range of colors, and you can mix them to create custom shades. Third, it is incredibly durable once baked. Your creations can last for years with proper care.
Another great benefit is accessibility. You do not need special tools or a kiln. A standard kitchen oven works perfectly. This makes polymer clay crafting a fun and affordable hobby for people of all ages. Kids, teens, and adults can all enjoy the creative process.
Gathering Your Supplies
Before you start, make sure you have everything you need. Having the right supplies makes the process smoother and more enjoyable. Here is a simple list of what you will need to begin your polymer clay crafting journey.
- Sculpey oven bake clay in your chosen colors
- A clean, flat work surface like a cutting board or tile
- A rolling pin or clay roller
- Clay shaping tools like knives, blades, and sculpting tools
- An oven-safe baking dish or tile
- Parchment paper or aluminum foil
- An oven-safe thermometer
- Sandpaper for finishing (optional)
- Acrylic paint and sealant for decorating (optional)
You do not need to buy everything at once. Start with the basics and add tools as you grow more comfortable. Many beginner kits include several colors of clay and basic tools, which is a great way to get started without a big investment.
Setting Up Your Workspace
Choose a clean, flat area with good lighting. Cover your work surface with parchment paper or a silicone mat to keep it clean. Polymer clay can leave a residue, so protecting your table is a smart move. Make sure your workspace is well-ventilated, especially when you start baking. While Sculpey clay is non-toxic, it is always good practice to work in a space with airflow.
Keep your tools organized and within reach. Having everything close by prevents frustration and keeps your creative flow going. A small tray or caddy works well for holding your tools, clay, and other supplies.
Preparing and Conditioning the Clay
Conditioning is one of the most important steps in working with polymer clay. It involves kneading the clay with your hands to warm it up and make it soft and pliable. Skipping this step can lead to cracks, breaks, and an uneven finish after baking. Take your time with conditioning, as it sets the foundation for a successful project.
To condition your clay, tear off a piece and start kneading it in your hands. Fold it over, press it down, and twist it. Repeat this process for several minutes until the clay feels smooth and flexible. It should bend easily without cracking at the edges. The warmer and softer the clay becomes, the easier it is to shape.
Tips for Effective Conditioning
Here are some practical tips to make conditioning faster and easier:
- Warm the clay first: Place the clay in a warm spot for a few minutes before kneading. Warm clay is more pliable and responds better to conditioning.
- Use a pasta machine: If you plan to work with clay regularly, a pasta machine is a great investment. It rolls the clay to a uniform thickness and mixes the ingredients thoroughly.
- Work in small batches: Large pieces of clay take longer to condition. Break them into smaller portions for faster results.
- Check for cracks: If your clay cracks while you are working with it, it needs more conditioning. Keep kneading until the cracks disappear.
Conditioning is not just about softening the clay. It also ensures that the plasticizers are evenly distributed throughout the material. This even distribution leads to a more consistent bake and a stronger finished product.
Shaping and Sculpting Your Project
Now comes the fun part, shaping your creation. Whether you are making a simple pendant, a cute figurine, or a decorative bowl, the shaping process is where your creativity shines. There is no right or wrong way to sculpt with Sculpey clay. Let your imagination guide you.
Start by planning your design. If you are a beginner, choose a simple project like a pair of earrings or a small charm. As you gain confidence, you can tackle more complex pieces. Sketch your idea on paper first if that helps you visualize the final result.
Basic Sculpting Techniques
Here are some fundamental techniques to help you shape your clay with ease:
- Rolling: Use a rolling pin to create flat, even sheets of clay. This is great for making pendants, tiles, or base pieces.
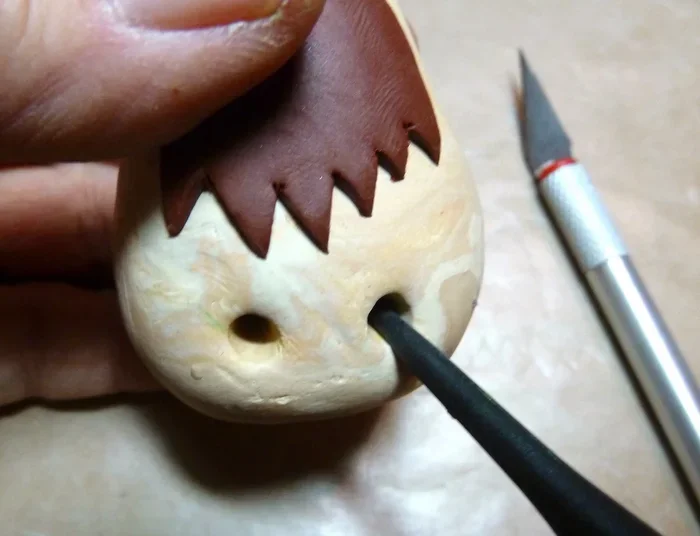
- Pinching: Use your fingers to pinch and shape small details. This works well for creating eyes, noses, and other facial features on figurines.
- Coil Building: Roll thin snakes of clay and stack them to build up shapes. This technique is perfect for bowls, cups, and sculptures.
- Slip and Score: Rub a little water or clay softener on surfaces you want to join. This helps pieces stick together securely.
- Texturing: Press patterns into the clay using stamps, fabric, or textured objects. This adds interesting details and visual depth.
Take your time while shaping. Rushing can lead to uneven thickness, which causes some parts to bake faster than others. Aim for a consistent thickness throughout your piece, about a quarter inch for most projects. If your clay becomes too warm and soft while working, set it aside for a few minutes to cool down.
Baking Your Sculpey Creation
Baking is the step that transforms your soft clay into a solid, durable piece. Getting the temperature and timing right is crucial for a successful result. Too much heat can burn your creation, while too little heat can leave it crumbly and weak.
The standard baking temperature for Sculpey oven bake clay is 275°F (130°C). Always preheat your oven before placing your piece inside. This ensures the temperature is stable from the moment the clay goes in. Use an oven-safe thermometer to verify the actual temperature inside your oven, as many home ovens can be off by 10 to 25 degrees.
Baking Time Guidelines
Baking time depends on the thickness of your piece. Here are some general guidelines to follow:
- Pieces 1/4 inch thick: Bake for 15 minutes
- Pieces 1/2 inch thick: Bake for 30 minutes
- Pieces 3/4 inch thick: Bake for 45 minutes
- Pieces 1 inch thick: Bake for 60 minutes
Remember, these are general guidelines. Thicker pieces may need a little extra time. The key is to bake for the correct duration based on thickness. Never increase the temperature to speed up baking. Higher temperatures can scorch the clay and release unpleasant fumes.
Common Baking Mistakes to Avoid
Even experienced crafters sometimes make mistakes when baking. Here are a few to watch out for:
- Skipping the thermometer: Guessing the oven temperature can lead to underbaked or overbaked clay.
- Baking on bare metal: Always use parchment paper or a ceramic tile to prevent shiny marks on the bottom of your piece.
- Opening the oven door too often: This causes temperature fluctuations that can affect your bake.
- Overbaking: Longer does not always mean better. Stick to the recommended times to avoid brittleness or discoloration.
- Using a microwave: Microwaves do not heat polymer clay evenly and can damage your piece. Always use a conventional oven.
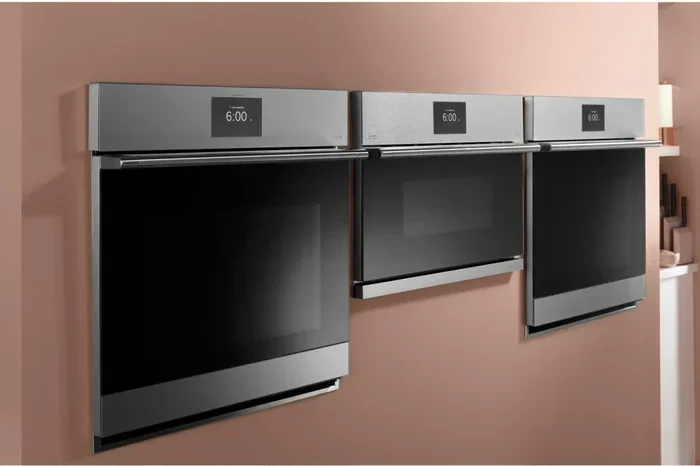
Place your clay project on a baking sheet lined with parchment paper or aluminum foil. If you are worried about your clay sticking, a silicone baking mat also works well. Keep your piece in the center of the oven for the most even heat distribution.
Finishing and Caring for Your Baked Clay
Once your piece comes out of the oven, let it cool completely before handling. The clay is still slightly soft when hot and will firm up as it cools. This cooling process is important for achieving the best results.
After cooling, you can sand any rough edges with fine-grit sandpaper. Start with a coarser grit and work your way up to a finer one for a smooth finish. This step is especially helpful for jewelry pieces that need to feel polished and comfortable to wear.
Painting and Sealing Your Creation
One of the best things about baked Sculpey clay is that it takes paint beautifully. Use acrylic paints for the best results. Apply thin, even coats and let each layer dry completely before adding the next. This prevents the paint from cracking or peeling over time.
After painting, seal your piece with a clear glaze or varnish. This adds a protective layer that enhances the colors and increases durability. There are many sealant options available, including gloss, satin, and matte finishes. Choose the one that best suits your project and personal style.
How to Keep Your Clay Projects Looking Great
Proper care helps your baked clay creations last for years. Here are a few simple tips:
- Avoid exposing your pieces to direct sunlight for long periods, as this can cause fading.
- Store your creations in a cool, dry place away from heat sources.
- Handle your pieces gently to prevent scratches and chips.
- Clean with a soft, damp cloth. Avoid harsh chemicals or abrasive cleaners.
- For jewelry, keep pieces away from water and perfumes that can damage the finish.
With proper care, your Sculpey creations will look beautiful for a very long time. The durability of baked polymer clay makes it a wonderful material for gifts, home decor, and personal keepsakes.
Quick Tips for Beginners
Starting out with Sculpey oven bake clay can feel overwhelming, but these quick tips will help you get off to a great start:
- Start simple: Your first project should be easy and fun. Earrings, keychains, and simple charms are perfect for building confidence.
- Wash your hands: Clean hands prevent dirt and oils from getting into your clay, which can affect the finish.
- Work in a cool room: Warm rooms make clay too soft and sticky. A cool, comfortable workspace is ideal.
- Use cornstarch: A little cornstarch on your hands prevents the clay from sticking while you work.
- Label your clay: If you work with multiple colors, label them to avoid mixing colors you did not intend to combine.
- Practice patience: Clay crafting is a skill that improves with practice. Do not be discouraged if your first few projects are not perfect.
Remember, every crafter started somewhere. The more you practice, the better your pieces will become. Enjoy the process and celebrate your progress along the way.
Expert Insights on Working with Polymer Clay
Experienced polymer clay artists share a few insights that can elevate your craft. First, always condition your clay thoroughly. This single step makes a noticeable difference in the quality of your finished piece. Second, invest in a good oven thermometer. It is a small tool that prevents big problems. Third, do not be afraid to experiment with techniques and color combinations. Some of the best polymer clay creations come from happy accidents and creative exploration.
Another expert tip is to keep your clay wrapped tightly when not in use. Polymer clay can dry out over time, especially if left exposed to air. Proper storage keeps it soft and ready for your next project. A zip-lock bag or airtight container works perfectly for this purpose.
Conclusion
How To Use Sculpey Oven Bake Clay is a skill that anyone can learn with a little patience and practice. From conditioning and shaping to baking and finishing, each step plays an important role in creating beautiful, lasting pieces. The versatility of polymer clay means there is always something new to try, whether you are a complete beginner or an experienced crafter looking to refine your skills.
Start with simple projects, follow the baking guidelines carefully, and do not skip the conditioning step. These fundamentals will serve you well as you explore more advanced techniques and ambitious designs. The joy of creating something with your own hands is one of the most rewarding experiences you can have. So gather your supplies, fire up your oven, and let your creativity flow. Happy crafting!
Frequently Asked Questions
Can I use Sculpey oven bake clay in a toaster oven?
Yes, you can use Sculpey clay in a toaster oven. Just make sure the temperature stays at 275°F and use an oven-safe thermometer to monitor the heat. Toaster ovens can heat unevenly, so rotate your piece halfway through baking for the best results.
Is Sculpey oven bake clay safe to use at home?
Yes, Sculpey clay is non-toxic and safe to use at home. It does not release harmful fumes when baked at the recommended temperature. However, always work in a ventilated area and never exceed the recommended baking temperature of 275°F.
How do I know if my Sculpey clay is fully baked?
A fully baked Sculpey piece will be hard and durable to the touch. If it still feels soft or flexible, it needs more time in the oven. Use the recommended baking times based on thickness and always check with an oven-safe thermometer to confirm the correct temperature.
Can I mix different colors of Sculpey clay together?
Absolutely! Mixing colors is one of the best parts of working with polymer clay. Knead two or more colors together to create custom shades. The more you knead, the more blended and uniform the new color will become. Just make sure each color is fully conditioned before mixing.
What is the best way to store leftover Sculpey clay?
Store leftover clay in a cool, dry place in an airtight container or zip-lock bag. This prevents the clay from drying out and collecting dust. Keep it away from direct sunlight and heat sources, which can soften or damage the clay over time.
Can I bake Sculpey clay on a baking sheet lined with wax paper?
It is best to avoid wax paper because it can stick to the clay during baking. Parchment paper, aluminum foil, or a silicone baking mat are much safer options. They prevent sticking and make cleanup easy after your project is done.