How To Set Up A Cuisinart Coffee Maker The Right Way
Setting up a Cuisinart coffee maker is simple when you follow the right steps. This guide walks you through unboxing, placing parts, adding water, and programming your brew settings for the perfect cup every time. You will also learn how to customize brew strength, use the auto pause feature, and keep your machine clean for long-lasting performance.
There is nothing quite like the smell of fresh coffee brewing in your kitchen. A Cuisinart coffee maker makes this easy, but setting it up correctly matters more than most people think. Whether you just unboxed your new machine or you are replacing an old one, getting the setup right ensures great taste every single morning.
This guide covers everything you need to know. From unboxing your parts to programming your first brew, we will walk you through each step in plain language. You will also learn how to adjust brew strength, use helpful features like auto pause, and keep your machine clean for years to come. By the end, your morning coffee routine will feel effortless and enjoyable.
Setting up a programmable coffee maker might seem intimidating at first. But trust us, it is much simpler than it looks. In just a few minutes, you will have your machine ready to go. Let us get started with what you need before you begin.
Key Takeaways
- Unbox and identify all parts: Know your water reservoir, carafe, filter basket, and power cord before you start.
- Follow the step-by-step setup: Add water, place the filter, add grounds, and brew your first cycle for best results.
- Program your brew settings: Use the programmable timer and brew strength control to match your morning routine.
- Clean regularly: Daily rinsing and monthly descaling keep your coffee tasting fresh and your machine running smoothly.
- Use the right water and grounds: Filtered water and the correct coffee grounds measurement make a big difference in flavor.
- Troubleshoot common issues fast: Know what to do when your machine does not brew or makes strange noises.
📑 Table of Contents
What You Will Need Before You Start
Before you plug in your machine, gather a few simple items. Having everything ready saves time and prevents frustration during the setup process. Here is a quick checklist of what you need:
- Your Cuisinart coffee maker and all included parts
- A clean water source for filling the reservoir
- Coffee filters (paper or permanent, depending on your model)
- Ground coffee of your preferred brand and roast
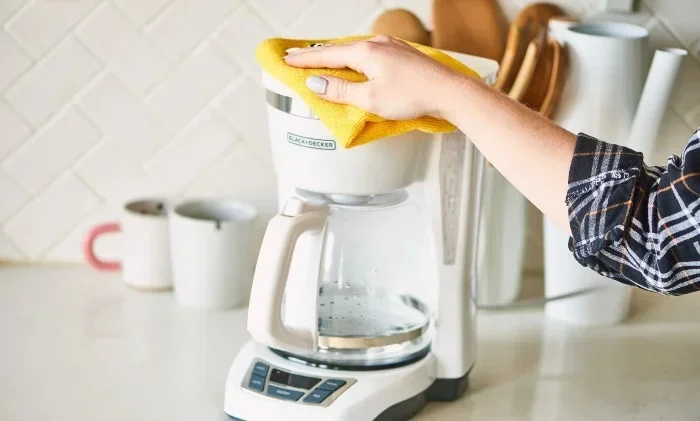
- A clean, dry cloth for wiping down the machine
- A flat, stable surface on your kitchen counter
Most Cuisinart models come with a permanent filter or a basket for paper filters. Check your manual to confirm which type your machine uses. If you are unsure about your specific model, look for the Cuisinart DCC series number on the bottom of the unit. This helps you find the right parts and accessories if you ever need replacements.
Also, make sure your counter has enough space around the machine. Good airflow keeps the unit cool during brewing. Place it away from the edge of the counter and any heat sources. A stable surface prevents spills and accidents during your morning coffee routine.
Unboxing and Identifying Your Cuisinart Parts
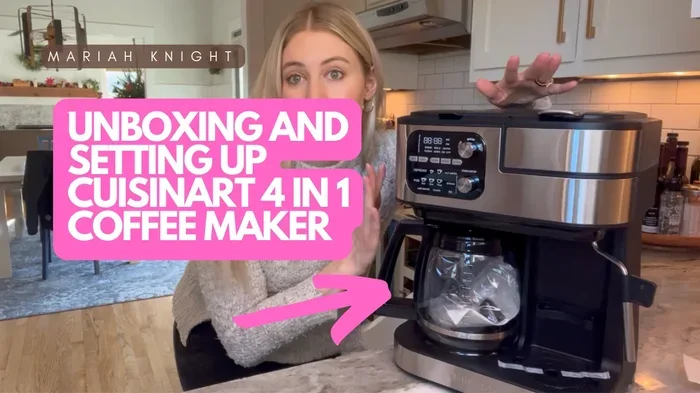
When you first open the box, take a moment to look at everything inside. Most Cuisinart machines come with the same core parts. Knowing each piece before setup makes the process much smoother.
The Water Reservoir
The water reservoir is the tall detachable tank on the back or side of the machine. This is where you pour in fresh water before each brew. Most Cuisinart 12 cup coffee maker models have a reservoir that holds enough water for a full pot. The reservoir usually has measurement marks on the side so you can fill it to the exact level you need.
The Carafe and Warming Plate
The carafe warming plate keeps your brewed coffee at the perfect drinking temperature. The glass carafe sits on top of this plate while it heats. Always make sure the carafe is clean and dry before you start. A residue-free carafe ensures your coffee tastes fresh from the very first pour.
The Filter Basket
The coffee filter placement area is where you put your ground coffee. This basket slides into the machine and holds the filter in place during brewing. If your model includes a permanent filter, you can skip paper filters and just rinse it after each use. Paper filters produce a cleaner taste, while permanent filters are more eco-friendly and save money over time.
The Control Panel
The control panel is where the magic happens. Most Cuisinart machines feature buttons for the brew button, program settings, brew strength control, and auto pause. Take a moment to look at each button and understand what it does before you start setting up. This small step makes the whole process much faster.
How To Set Up A Cuisinart Coffee Maker Step by Step
Now comes the fun part. Follow these simple steps and your machine will be ready to brew in no time. Each step is designed to be quick and easy, even if you have never set up a coffee maker before.
Step One: Wash All Removable Parts
Before you use your machine for the first time, wash all removable parts with warm soapy water. This includes the carafe, lid, filter basket, and water reservoir. Rinse everything thoroughly and dry with a clean cloth. This removes any dust or manufacturing residue that may have collected during shipping.
Step Two: Place the Machine on a Stable Surface
Set your drip coffee maker on a flat, dry countertop near an electrical outlet. Make sure the back of the machine is close enough to the wall for the power cord to reach safely. Leave at least a few inches of space behind the machine for ventilation. A good spot keeps the unit safe and makes it easy to access the reservoir and carafe.
Step Three: Install the Filter Basket
Slide the filter basket into its slot inside the machine. If you are using a paper filter, place it inside the basket first. Make sure the filter sits flat and snugly against the sides. For permanent filters, just place the basket in position without a paper filter. A properly seated filter prevents grounds from leaking into your coffee.
Step Four: Add Water to the Reservoir
Remove the water reservoir and fill it with fresh, cold water. Use the measurement marks on the side to fill the right amount for your desired number of cups. For a full 12 cup coffee maker pot, fill to the 12-cup line. Always use cold filtered water for the best taste. Hot tap water can contain minerals and off-flavors that affect your brew.
Once filled, place the reservoir back in its position. Make sure it clicks or sits securely in place. A loose reservoir can cause leaks during brewing.
Step Five: Add Coffee Grounds
Open the filter basket and add your ground coffee. The general rule is two tablespoons of grounds per six ounces of water. For a full 12-cup pot, you will need about 12 tablespoons of coffee. Adjust this amount based on your personal taste preferences.
Using the right coffee grounds measurement is key to a great cup. Too little coffee makes weak brew, while too much can cause clogging and over-extraction. If you like strong coffee, try adding an extra half tablespoon per cup and see how it tastes.
Step Six: Place the Carafe and Start Brewing
Put the glass carafe on the warming plate. Make sure the lid is on securely. Then press the brew button to start your first cycle. The machine will heat the water and drip it through the grounds and filter into the carafe below.
Watch the first brew closely. You should see water flowing steadily through the system. If anything seems off, stop the machine and check your setup. Your coffee maker instructions manual can help you troubleshoot any issues you notice during this first run.
Step Seven: Run a Cleaning Cycle
After your first brew, run one more cycle with just plain water and no coffee grounds. This flushes out any dust or residue from the machine. It also helps you check that everything is working correctly. Discard the water from the carafe after this rinse cycle, and your machine is ready for real use.
For a thorough first cleaning, you can also refer to our guide on how to clean oven with burnt food for general kitchen appliance cleaning tips that apply broadly.
Customizing Your Brew Settings
One of the best things about a Cuisinart coffee maker is the ability to customize your brew. These features let you tailor every cup to your exact preferences. Once you understand how they work, your coffee will taste even better.
Adjusting Brew Strength
Most Cuisinart machines include a brew strength control setting. This feature lets you choose between regular and bold brew strengths. The bold setting slows down the water flow, allowing more flavor to extract from the grounds. It is perfect for people who love rich, full-bodied coffee.
To use this feature, simply press the brew strength button before you start brewing. The machine will remember your preference for future brews. Experiment with both settings to find the one you enjoy most. Many coffee lovers find that a bold setting brings out deeper, more complex flavors in medium and dark roast beans.
Programming the Auto Brew Timer
The programmable timer is a game-changer for busy mornings. You can set your machine to start brewing up to 24 hours in advance. This means you wake up to the smell of fresh coffee already waiting for you.
To program the timer, press the program button and set your desired brew time using the hour and minute buttons. Make sure the reservoir is filled and the filter basket has grounds before you set the timer. The machine will automatically start brewing at the time you programmed. This feature is a huge time-saver and makes your morning coffee routine feel almost effortless.
Using the Auto Pause Feature
The auto pause feature is one of the most convenient functions on a Cuisinart machine. It lets you remove the carafe mid-brew to pour a cup while the rest of the coffee continues brewing. The machine pauses the drip when you lift the carafe and resumes when you place it back on the warming plate.
This feature works great when you need that first cup before the full pot is done. Just make sure the carafe is placed back on the plate within a few seconds. Most models have a pause limit of about 10 seconds before the machine stops the drip to prevent overflow.
Setting the Brew Temperature
The ideal coffee brewing temperature is between 195 and 205 degrees Fahrenheit. Cuisinart machines are designed to reach this range automatically. If your coffee tastes bitter or weak, the temperature setting might need adjustment. Some models allow you to control the brew temperature through the programming menu.
Using the right temperature ensures proper extraction without burning the grounds. This is one of the most overlooked factors in making great coffee at home. If your machine does not have a temperature control, using fresh, cold filtered water helps maintain the right brewing heat.
Cleaning and Maintenance Tips
Keeping your coffee maker clean is essential for great-tasting coffee and long machine life. A well-maintained machine brews better and lasts for years. Here is how to care for your Cuisinart properly.
Daily Cleaning Routine
After each use, toss the used coffee grounds and rinse the filter basket with warm water. Wash the carafe and lid with warm soapy water and dry them thoroughly. Wipe down the outside of the machine with a damp cloth to remove any splashes or dust.
Never leave used grounds sitting in the filter basket overnight. They can grow mold and create unpleasant odors. A quick rinse after every brew keeps your machine fresh and ready for the next morning.
If you are also dealing with kitchen messes elsewhere, you might find our article on how to reheat brats in oven helpful for keeping your kitchen clean after breakfast prep.
Monthly Descaling
Mineral buildup from hard water can clog your machine over time. Descaling removes this buildup and keeps your coffee tasting clean. Cuisinart sells a descaling solution, but you can also use a mixture of white vinegar and water.
To descale, fill the reservoir with equal parts vinegar and water. Run a half brew cycle, then let the machine sit for 30 minutes. Finish the cycle and run two more cycles with plain water to rinse out the vinegar smell. Descale your machine at least once a month if you live in a hard water area.
Regular descaling prevents clogging and keeps the coffee maker parts functioning properly. It also extends the life of your heating element and ensures consistent brew temperatures over time.
Replacing Filters and Parts
If you use paper filters, replace them after every brew. Permanent filters should be washed weekly and replaced every few months if they become worn or scratched. Check the carafe for chips or cracks regularly, as a damaged carafe can affect brewing performance.
For a deeper clean of your kitchen appliances, you might also want to check out tips on how to warm tortilla chips in oven for a great breakfast pairing with your fresh coffee.
Storing Your Machine Properly
If you plan to store your coffee maker for an extended period, clean it thoroughly first. Leave all parts completely dry before storing to prevent mold and mildew. Store the machine in a cool, dry place away from direct sunlight. Cover it with a breathable cloth rather than plastic to prevent dust buildup.
Troubleshooting Common Setup Problems
Even with careful setup, you might run into a few issues. Most problems are easy to fix with simple solutions. Here are the most common issues and how to solve them.
Machine Does Not Turn On
If your machine does not power on, first check that it is plugged in securely. Test the outlet with another appliance to make sure it is working. Also check that the carafe is properly seated on the warming plate, as some models will not start if the carafe is not in place. This safety feature prevents spills and accidents.
Water Leaks During Brewing
Leaking usually happens when the water reservoir is not seated properly or when the filter basket is overflowing. Make sure the reservoir is clicked firmly into place. Do not overfill the water tank, and use the correct amount of coffee grounds for the water level you are using.
Coffee Tastes Weak or Bitter
Weak coffee usually means you need more grounds or the machine is not brewing hot enough. Try increasing your coffee grounds measurement by a small amount. Bitter coffee often means the water is too hot or the grounds are too fine. Using a coarser grind and checking your water temperature can help fix this issue.
If you continue to experience problems, consult the troubleshooting section of your coffee maker instructions manual. Cuisinart also offers customer support for their coffee maker troubleshooting needs. Keep your model number handy when you reach out for help.
Fun Tips for Making the Most of Your Coffee Maker
Your Cuisinart coffee maker can do more than just brew coffee. Get creative with these fun tips that make your mornings even better.
Use the hot water function to heat water for instant oatmeal or tea. Simply run a brew cycle with an empty filter and collect the hot water in the carafe. This is a quick way to get hot water without waiting for a kettle to boil.
On lazy weekends, you can even make smores at home without oven by using the hot water from your coffee maker to melt marshmallows on graham crackers. It is a fun and unexpected way to enjoy your machine beyond just brewing coffee.
You can also use your coffee maker to warm up leftover breakfast items. If you want to reheat sausage links or patties, you can place them on a plate near the warming plate while your next pot brews. For a more detailed approach to reheating meats, check out our guide on how to reheat brats in oven for general reheating techniques that work across kitchen appliances.
Conclusion
Setting up your Cuisinart coffee maker the right way makes a huge difference in taste and performance. From washing the parts to programming your brew settings, each step matters. You now know how to add water, place your filter, measure your grounds, and use all the helpful features your machine offers.
Regular cleaning and maintenance keep your coffee fresh and your machine running for years. The brew strength control, auto pause, and programmable timer are features that elevate your daily coffee experience. Take the time to explore each setting and find what works best for you.
Remember, great coffee starts with a great setup. Follow the steps in this guide, and you will enjoy perfect cups every morning. Your Cuisinart coffee maker is a reliable kitchen companion that will serve you well for years to come. Now go ahead, brew that first cup, and enjoy every sip.
Frequently Asked Questions
How long does it take to set up a Cuisinart coffee maker for the first time?
The full first-time setup takes about 15 to 20 minutes. This includes washing all parts, placing the machine on the counter, adding water and coffee grounds, and running a cleaning cycle. After the initial setup, daily preparation takes less than five minutes.
Can I use tap water in my Cuisinart coffee maker?
Yes, you can use tap water, but filtered water produces better-tasting coffee. Tap water may contain minerals and chlorine that affect flavor and cause faster mineral buildup inside the machine. Using filtered water also extends the life of your machine and reduces the need for frequent descaling.
How often should I descale my Cuisinart coffee maker?
You should descale your machine at least once a month. If you live in an area with hard water, you may need to descale every two weeks. Signs that descaling is needed include slower brewing times, unusual noises, or a change in coffee taste. Regular descaling keeps your machine running at peak performance.
What is the best coffee grind size for a Cuisinart drip coffee maker?
A medium grind works best for drip coffee makers. It is not too fine and not too coarse, allowing for proper extraction during the brewing cycle. Avoid using espresso grind or French press grind, as these can clog the filter basket and produce bitter or weak coffee respectively.
Why does my Cuisinart coffee maker stop brewing mid-cycle?
This usually happens when the auto pause feature is triggered by removing the carafe. It can also occur if the water reservoir is empty or the filter basket is clogged with old grounds. Check that the carafe is properly seated, the reservoir has enough water, and the filter basket is clean before starting a new brew cycle.
Can I leave my Cuisinart coffee maker on overnight?
It is not recommended to leave your machine on overnight. Most Cuisinart models have an auto shutoff feature that turns the machine off after a set period, usually two hours. However, unplugging the machine when not in use is always the safest practice and also saves energy.