How To Light A Whirlpool Gas Stove Oven Step By Step
Learning how to light a Whirlpool gas stove oven is easier than you think. This guide walks you through every step with clear instructions and safety tips. Whether your oven has a pilot light or electric ignition, you will find the method that works. We also cover troubleshooting, maintenance, and when to call a pro. By the end, you will feel confident lighting your oven safely and quickly.
There is something satisfying about cooking with a gas oven. The even heat, the quick response, and that classic feel of a Whirlpool stove in your kitchen. But when the oven refuses to light, it can feel frustrating and even a little scary. You might stand there staring at the controls, wondering what you are doing wrong. The good news is that lighting a Whirlpool gas stove oven is a straightforward process once you know the steps.
Whether you have a newer model with electric ignition or an older unit with a standing pilot light, this guide has you covered. We will walk you through everything from the basic lighting process to troubleshooting common problems. You will also learn important safety tips and maintenance habits that keep your oven running well for years. Let us get started and take the mystery out of your Whirlpool gas oven.
Key Takeaways
- Know Your Oven Type: Whirlpool gas ovens use either a pilot light or electronic ignition system.
- Follow Safety First: Always check for gas leaks and ensure proper ventilation before lighting.
- Step-by-Step Process: We break down the lighting process into simple, easy-to-follow steps.
- Troubleshooting Helps: Learn to fix common issues like a faulty igniter or clogged burner.
- Regular Maintenance Matters: Cleaning and inspecting your oven prevents most lighting problems.
- When In Doubt, Call A Pro: Some issues need a certified technician for safe repair.
📑 Table of Contents
- Understanding Your Whirlpool Gas Stove Oven
- How To Light A Whirlpool Gas Stove Oven Step By Step
- Troubleshooting Common Whirlpool Gas Oven Lighting Problems
- Safety Tips For Lighting Your Whirlpool Gas Oven
- Maintaining Your Whirlpool Gas Oven For Best Performance
- When To Call A Professional For Your Whirlpool Gas Oven
- Comparison Table: Pilot Light vs. Electronic Ignition
- Quick Tips For Everyday Oven Use
- Common Mistakes People Make When Lighting A Gas Oven
- Frequently Asked Questions
- Conclusion
Understanding Your Whirlpool Gas Stove Oven
Before you touch any controls, it helps to understand how your oven works. Whirlpool makes several gas oven models, and they use different ignition systems. Knowing which type you have makes the whole process much simpler. Let us look at the two main types.
Pilot Light Ignition Systems
Older Whirlpool gas ovens often use a small, continuous pilot light. This is a tiny flame that stays lit inside the oven compartment at all times. When you turn the oven on, the pilot light ignites the gas that flows to the main burner. You can usually see the pilot light through a small opening at the bottom of the oven.
The pilot light has a few key parts. There is the pilot tube, the thermocouple, and the flame itself. The thermocouple is a safety device. It detects whether the pilot light is lit and shuts off the gas supply if the flame goes out. This prevents gas from building up inside your oven, which is very important for your safety.
Electronic Ignition Systems
Most modern Whirlpool gas ovens use an electronic ignition system. Instead of a standing flame, these ovens spark the gas to life when you turn the dial. There are two main types of electronic ignition. One uses a spark electrode near the burner. The other uses a glow bar igniter, which heats up until it is hot enough to ignite the gas.
Electronic ignition ovens are more energy-efficient and safer than pilot light models. They only use gas when the oven is actually running. If you are not sure which type your oven uses, check your owner’s manual or look for a model number on the inside of the oven door.
How To Light A Whirlpool Gas Stove Oven Step By Step
Now that you know what kind of oven you have, let us get into the actual lighting process. Follow these steps carefully and do not rush. Safety always comes first when working with gas appliances.
Step 1: Prepare Your Workspace
Start by clearing the area around your Whirlpool stove. Remove any oven racks, baking sheets, or foil from the bottom of the oven. You need clear access to the oven floor and the burner or pilot assembly. Make sure the kitchen is well ventilated. Open a window or turn on the exhaust fan if you have one.
Next, check that the gas supply is turned on. The gas valve behind the stove should be in the on position. If you recently had work done on your gas line, double-check that everything is connected properly. A loose connection can cause a gas leak, which is a serious safety hazard.
Step 2: Access The Ignition Area
For pilot light ovens, remove the oven floor panel. This panel is usually held in place by a few screws or clips. Set the screws aside in a safe place so you do not lose them. Once the panel is removed, you should see the pilot light assembly at the bottom of the oven cavity.
For electronic ignition ovens, the igniter is typically located near the back of the oven floor or inside the burner tube. You may need to remove the oven rack and the floor panel to access it. Refer to your Whirlpool oven manual if you are unsure where the components are located.
Step 3: Light The Oven
If your oven has a pilot light, turn the oven knob to the pilot setting. This setting is usually marked with a small flame icon. Hold a long lighter or match near the pilot tube opening. You should see the pilot flame ignite within a few seconds. Keep holding the knob in for about 30 seconds to allow the thermocouple to heat up.
Once the thermocouple is heated, release the knob. The pilot light should stay lit. If it goes out, wait a few minutes and try again. This gives any residual gas time to dissipate. After the pilot light is burning steadily, turn the knob to your desired temperature setting.
For electronic ignition ovens, simply turn the oven knob to the start setting. The igniter should glow or spark within seconds. You will hear a clicking sound as the spark electrode works. Once the gas ignites, the clicking should stop and the oven will begin to heat up. This whole process usually takes less than a minute.
Step 4: Confirm The Oven Is Heating Properly
After lighting the oven, close the door and set the temperature to 350 degrees Fahrenheit. Wait about five to ten minutes. You should feel heat coming from the oven vents. If your oven has a light, you can peek inside to see the burner glowing.
Use an oven thermometer to verify the temperature if you want to be extra precise. This is a good habit to build. Sometimes ovens run a little hot or cold, and knowing the actual temperature helps you cook better. Place the thermometer on the middle rack and check again after fifteen minutes.
Step 5: Reassemble And Clean Up
Once you confirm the oven is working, put everything back in place. Replace the oven floor panel and secure it with the screws or clips. Put the oven racks back in their proper positions. Wipe down any soot or debris around the burner area with a damp cloth. Keeping the oven clean helps maintain good airflow and efficient heating.
Troubleshooting Common Whirlpool Gas Oven Lighting Problems
Sometimes, even when you follow all the steps, the oven will not light. This is more common than you might think. Before you panic, try these troubleshooting tips. Most issues are easy to fix and do not require a technician.
The Oven Will Not Light At All
If your Whirlpool gas oven will not light, the first thing to check is the gas supply. Make sure the valve behind the stove is fully open. Next, check the oven control knob. Is it turned to the correct setting? Sometimes the knob gets bumped accidentally, and the oven is not actually set to ignite.
For pilot light ovens, the pilot tube may be clogged with grease or food debris. Use a small needle or toothpick to gently clean out the pilot opening. For electronic ignition ovens, the igniter may be faulty. A worn-out glow bar or spark electrode will need to be replaced. These parts are inexpensive and usually easy to install.
The Oven Lights But Goes Out Immediately
This is a common problem with pilot light ovens. If the pilot light keeps going out, the thermocouple is likely the culprit. The thermocouple may be dirty, misaligned, or worn out. Try cleaning the thermocouple tip with fine-grit sandpaper. Make sure the pilot flame is touching the thermocouple. If the flame is too weak or too small, it will not heat the thermocouple enough to keep the gas valve open.
For electronic ignition models, a faulty control board could cause the oven to shut off right after lighting. This is a less common issue but does happen over time. If you suspect the control board, it is best to contact a professional for Whirlpool oven repair.
The Oven Takes A Long Time To Heat Up
A slow-heating oven can be frustrating when you are trying to cook dinner. Several factors can cause this problem. The oven temperature sensor may be malfunctioning. This sensor tells the oven when to stop heating, and if it is inaccurate, the oven will struggle to reach the right temperature.
Another cause is a weak igniter. In electronic ignition ovens, the igniter must draw enough current to open the gas valve. If the igniter is old and weak, it may glow but not draw enough power. This results in delayed ignition or uneven heating. Replacing the igniter usually solves this problem quickly.
The Oven Makes A Clicking Sound But Will Not Ignite
A clicking sound means the spark module is trying to ignite the gas. But if you do not see a flame, something is blocking the gas flow. Check for debris in the burner ports. Spills and food residue can clog the small holes where gas exits. Clean them carefully with a toothpick or a small brush.
Also, check the oven door seal. If the seal is damaged or warped, the oven may not maintain proper pressure for ignition. A worn door seal is a common but overlooked cause of ignition problems. Replacing the seal is simple and affordable.
Safety Tips For Lighting Your Whirlpool Gas Oven
Working with gas appliances requires respect and caution. A little care goes a long way in preventing accidents. Here are the most important safety tips to keep in mind every time you light your oven.
Always Check For Gas Leaks
Before lighting your oven, do a quick gas leak check. The simplest method is the soapy water test. Mix a small amount of dish soap with water in a spray bottle. Spray the solution along the gas line connections and the valve area. If you see bubbles forming, you have a leak. Do not light the oven until the leak is fixed.
Gas leaks are dangerous and should never be ignored. If you smell gas strongly, leave the kitchen immediately and call your gas company or emergency services. Do not use electrical switches or open flames near a suspected gas leak. This is a critical safety rule that everyone in the household should know.
Keep The Area Ventilated
Always ventilate your kitchen when lighting a gas oven. Open a window or run the range hood fan. Good airflow prevents gas buildup and ensures complete combustion. A well-ventilated kitchen also helps remove any initial odors that come with first lighting a gas oven.
Never Leave The Oven Unattended While Lighting
Stay with the oven while you are lighting it. Watch the igniter or pilot light closely. If the flame does not appear within a few seconds, turn the knob off and wait. Trying again immediately can allow gas to accumulate, which creates a fire risk. Wait at least 30 seconds before attempting to light the oven again.
Keep Flammable Items Away
Make sure there are no towels, paper, plastic, or cleaning supplies near the oven while lighting. These items can catch fire easily if they are too close to the oven opening or the pilot light area. Keep your kitchen counters clear around the stove area.
Teach Everyone In The Household
If you live with family or roommates, make sure everyone knows how to light the oven safely. Post the basic steps near the stove. Also, make sure everyone knows where the gas shut-off valve is located. In an emergency, being able to turn off the gas quickly is essential for safety.
Maintaining Your Whirlpool Gas Oven For Best Performance
Regular maintenance is the secret to a long-lasting, reliable Whirlpool gas oven. A little effort now saves you from bigger problems later. Here is how to keep your oven in great shape.
Clean The Oven Regularly
Food spills and grease buildup are the enemies of a gas oven. They can clog burner ports, block pilot tubes, and even affect the oven temperature sensor. Clean up spills as soon as the oven cools down. Do a deeper cleaning at least once a month. Use a mild oven cleaner or a mixture of baking soda and water for tough grime.
Avoid using harsh abrasives on the igniter or pilot assembly. These components are delicate and can be damaged by rough cleaning. A soft cloth or a small brush works best for the sensitive parts inside the oven.
Inspect The Door Seal
The oven door seal, also called the gasket, keeps heat inside the oven cavity. Over time, the seal can crack, peel, or become loose. A damaged seal lets heat escape, which makes the oven work harder and use more gas. Check the seal regularly by running your hand along the edges of the closed door. If you feel heat escaping, it is time to replace the gasket.
Check The Igniter And Pilot Assembly
Once every few months, inspect the igniter or pilot light assembly. Look for signs of wear, corrosion, or damage. A healthy igniter should glow bright orange or red. If it glows dull red or barely glows at all, it is time for a replacement. For pilot light ovens, make sure the flame is steady and blue. A yellow or flickering flame often indicates a clogged pilot tube or insufficient airflow.
Schedule Professional Maintenance
Even with regular cleaning and care, it is a good idea to have a professional inspect your Whirlpool gas oven once a year. A certified technician can spot potential problems before they become serious. They will check the gas pressure, inspect the safety valves, and test the overall performance of the oven. This annual check-up can extend the life of your appliance and keep your kitchen safe.
When To Call A Professional For Your Whirlpool Gas Oven
Most oven lighting issues are simple and can be fixed at home. But some problems require the expertise of a trained professional. Knowing when to call for help saves you time, money, and most importantly, keeps you safe.
Call a technician if you smell gas persistently and cannot find the source. A persistent gas odor is not something to troubleshoot on your own. Also, call a pro if the oven igniter sparks but never produces a flame. This could indicate a problem with the gas valve or the control board, both of which require professional diagnosis and repair.
If you have replaced the igniter, thermocouple, or other parts and the oven still will not light, it is time to seek professional help. Repeated failures may point to a deeper issue within the oven’s internal systems. A certified Whirlpool technician has the tools and training to diagnose and fix complex problems safely.
Finally, if your oven is more than 15 years old and experiencing frequent issues, consider whether a replacement makes more sense. Older gas ovens are less efficient and may not meet current safety standards. A new Whirlpool gas oven can save you money on gas bills and give you peace of mind with modern safety features.
Comparison Table: Pilot Light vs. Electronic Ignition
Understanding the difference between the two ignition systems helps you make informed decisions about your Whirlpool oven. Here is a quick comparison.
| Feature | Pilot Light Oven | Electronic Ignition Oven |
|---|---|---|
| Ignition Method | Small standing flame | Spark or glow bar |
| Energy Efficiency | Lower | Higher |
| Safety | Thermocouple safety valve | No open flame |
| Common In | Older models | Newer models |
| Maintenance | Clean pilot tube regularly | Replace igniter as needed |
| Cost To Repair | Low to moderate | Low to moderate |
Both systems work well when properly maintained. The key is knowing which type you have and following the right care routine. With good habits, your Whirlpool gas oven will serve you reliably for many years.
Quick Tips For Everyday Oven Use
Beyond lighting and troubleshooting, there are simple habits that improve your daily oven experience. Here are some quick tips to keep in mind.
- Preheat Your Oven: Always preheat before baking. This ensures even cooking and better results.
- Use The Right Rack Position: Place food in the center of the oven for most recipes. This allows for even heat circulation.
- Avoid Opening The Door Too Often: Every time you open the door, heat escapes. This makes the oven work harder to maintain temperature.
- Use Oven-Safe Cookware: Only use pans and dishes that are rated for oven use. This prevents damage and ensures safe cooking.
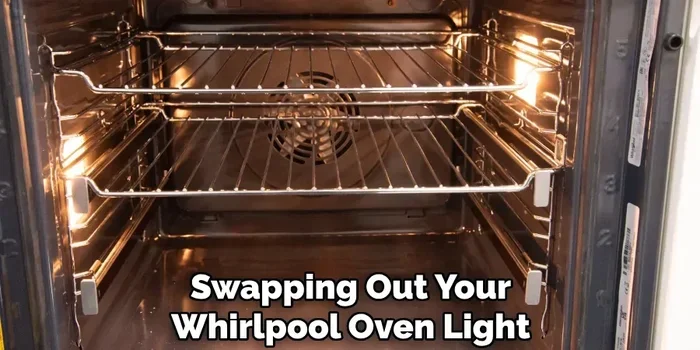
- Keep The Oven Light Clean: A dirty oven light makes it hard to check on your food. Wipe the light cover periodically.
- Rotate Pans Halfway Through: This simple step helps food cook evenly, especially in older ovens with hot spots.
Common Mistakes People Make When Lighting A Gas Oven
Even experienced cooks can make mistakes when lighting a gas oven. Being aware of these common errors helps you avoid them.
Mistake 1: Not Waiting Long Enough. Some people turn the knob and immediately let go. For pilot light ovens, you need to hold the knob for at least 30 seconds. Releasing too early means the thermocouple has not heated up enough to keep the gas flowing.
Mistake 2: Using The Wrong Knob Setting. Make sure you turn the knob to the pilot or start position, not the broil or off position. Each setting controls a different part of the oven, and using the wrong one will not produce a flame.
Mistake 3: Ignoring The Smell Of Gas. A slight gas odor when you first light the oven is normal. But a strong or persistent smell is not. Never ignore a strong gas odor. It could indicate a serious leak that needs immediate attention.
Mistake 4: Skipping Regular Cleaning. Grease and food buildup cause many oven problems. Skipping regular cleaning leads to clogged burners, weak flames, and uneven heating. A few minutes of cleaning after each use goes a long way.
Mistake 5: Trying To Fix Everything Yourself. While many issues are simple to resolve, some problems are beyond a DIY fix. Gas valve issues, control board failures, and major leaks need professional attention. Know your limits and call for help when needed.
Frequently Asked Questions
Why Will My Whirlpool Gas Oven Not Light?
There are several reasons a Whirlpool gas oven will not light. The most common causes are a clogged pilot tube, a faulty igniter, or a weak thermocouple. Start by checking the gas supply and cleaning the pilot opening or burner ports. If those steps do not work, the igniter or thermocouple may need replacement. These parts are affordable and easy to find online or at appliance stores.
How Long Does It Take To Light A Whirlpool Gas Oven?
Lighting a Whirlpool gas oven typically takes less than one minute for electronic ignition models. Pilot light ovens may take a little longer, usually one to two minutes, because you need to hold the knob while the thermocouple heats up. If the oven takes longer than this regularly, there may be an underlying issue worth investigating.
Is It Safe To Light A Gas Oven With A Lighter?
Yes, it is safe to use a long lighter or match to light a Whirlpool gas oven, as long as you follow proper safety steps. Make sure the oven knob is in the pilot position and the room is ventilated. Never use a short lighter that requires you to lean over the open oven. A long-reach lighter keeps your hands at a safe distance from the flame.
How Often Should I Clean My Whirlpool Gas Oven?
You should do a quick wipe-down after every use to prevent buildup. A deeper cleaning should be done at least once a month or whenever you notice spills and grime accumulating. Regular cleaning keeps the burner ports clear, the igniter working properly, and the oven performing at its best.
Can I Replace The Oven Igniter Myself?
Yes, most homeowners can replace a Whirlpool oven igniter with basic tools and a little patience. The igniter is usually held in place by a couple of screws and connected to a wiring harness. Turn off the power and gas supply before starting. If you feel unsure at any point, it is always best to consult a professional technician.
What Does It Mean If The Oven Flame Is Yellow Instead Of Blue?
A blue flame indicates proper combustion and good airflow. A yellow or orange flame usually means the burner is dirty or there is insufficient air supply. Clean the burner ports and make sure the oven is level. If the flame remains yellow after cleaning, there may be an air shutter adjustment needed, which a professional can handle.
Conclusion
Learning how to light a Whirlpool gas stove oven is a valuable skill that every homeowner should have. It saves you time, money, and the hassle of waiting for a repair technician. With the right knowledge and a little practice, you can light your oven quickly and safely every single time. Remember to always put safety first, check for gas leaks, and follow the steps outlined in this guide.
Regular maintenance goes a long way in preventing lighting problems. Clean your oven often, inspect the igniter and pilot assembly, and replace worn parts promptly. These simple habits keep your Whirlpool gas oven running efficiently and reliably. And when a problem is beyond your comfort level, do not hesitate to call a professional. A qualified technician can handle complex issues and keep your kitchen safe.
Your Whirlpool gas oven is a workhorse in the kitchen. With the right care and attention, it will serve you well for many years to come. Now that you know exactly how to light it, troubleshoot it, and maintain it, you are ready to take on any oven challenge with confidence. Happy cooking and enjoy every meal you prepare in your trusted Whirlpool gas oven.