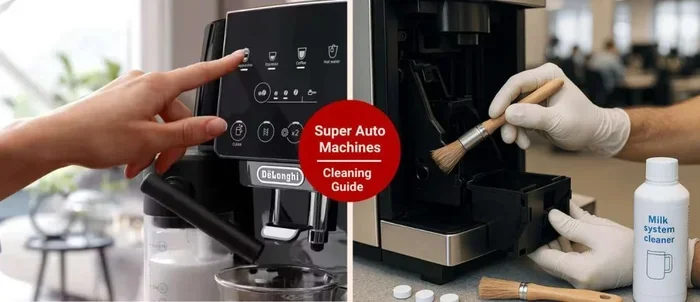
How To Clean Auto Coffee Maker With These Easy Tips
Keeping your auto coffee maker clean is essential for great-tasting coffee and long-lasting performance. This guide shows you simple, effective ways to clean auto coffee maker parts, remove mineral buildup, and prevent stale flavors. With just a few household items and regular maintenance, your machine will brew like new every single day.
Nothing beats the convenience of an auto coffee maker brewing your morning cup while you sleep. But here is the thing most people forget. That machine needs regular cleaning just like any other kitchen appliance. Over time, mineral deposits, coffee oils, and residue build up inside your brewer. This affects the taste of your coffee and can even harbor bacteria. If you have noticed your coffee tasting off or your machine running slower, it might be time for a good cleaning session.
In this guide, we walk you through every step needed to clean auto coffee maker equipment properly. We cover daily quick wipes, weekly deep cleans, and monthly descaling routines. You do not need expensive products either. Most of what you need, you already have in your kitchen pantry. Let us get into it and bring your coffee maker back to life.
Key Takeaways
- Regular cleaning prevents mold, bacteria, and bitter-tasting coffee from your machine.
- White vinegar and water are the best natural descaling agents for auto drip coffee makers.
- Disassembling removable parts weekly keeps your coffee fresh and your machine running smoothly.
- Deep cleaning once a month removes stubborn mineral deposits and coffee oil buildup.
- Using filtered water reduces scale buildup and extends the life of your coffee maker.
- Never use abrasive cleaners or steel wool on your coffee maker internals.
📑 Table of Contents
- Why Cleaning Your Auto Coffee Maker Matters
- What You Need to Clean Your Auto Coffee Maker
- Step-by-Step Guide to Clean Auto Coffee Maker
- How to Descale Your Auto Coffee Maker
- Common Mistakes to Avoid When Cleaning
- How Often Should You Clean Your Auto Coffee Maker
- Quick Tips for Keeping Your Coffee Maker Sparkling
Why Cleaning Your Auto Coffee Maker Matters
Many people think their coffee maker cleans itself because it is automatic. That is a big misconception. The machine brews hot water through grounds, but it does not magically wash away the residue left behind. Coffee oils stick to the interior walls. Mineral deposits from water accumulate in the heating element and tubes. Mold and bacteria can grow in the warm, moist environment inside the machine.
Here are the main reasons you should make coffee maker cleaning a regular habit:
- Better tasting coffee. Old oils and residue make coffee taste bitter or stale. A clean machine brews a fresher, cleaner cup every time.
- Longer machine lifespan. Scale buildup forces your coffee maker to work harder. This wears out parts faster and shortens the overall life of the device.
- Health benefits. Mold and bacteria thrive in dark, damp coffee makers. Regular cleaning removes these harmful organisms before they become a problem.
- Better brewing performance. A clean machine heats water properly and flows at the right rate. This means better extraction and a more balanced brew.
- No weird smells. Old coffee oils go rancid. A clean machine smells fresh and does not transfer off-odors to your morning cup.
Think of it this way. You would not wash your coffee mug once and never clean it again. The same logic applies to the entire machine. Cleaning auto coffee maker parts regularly is one of the easiest ways to improve your daily coffee experience.
What You Need to Clean Your Auto Coffee Maker
Before you start, gather your supplies. You do not need anything fancy. Most cleaning solutions are things you already have at home. Here is a simple list of everything you need for a thorough coffee maker maintenance routine:
Essential Cleaning Supplies
- White distilled vinegar. This is the MVP of coffee maker cleaning. It dissolves mineral deposits and breaks down coffee oils naturally.
- Baking soda. Great for scrubbing away stubborn stains on removable parts without scratching surfaces.
- Dish soap. A mild liquid soap works perfectly for washing the carafe, filter basket, and other detachable components.
- Warm water. Always use warm water for mixing solutions and rinsing parts. Hot water helps dissolve oils more effectively.
- Soft microfiber cloth. Use this for wiping down the exterior and interior surfaces without leaving scratches.
- Soft-bristled brush. An old toothbrush works great for reaching tight corners and crevices in the filter basket and water reservoir.
- Cotton swabs. These are perfect for cleaning small openings and hard-to-reach areas around buttons and vents.
Optional but Helpful Tools
- Compressed air canister. Useful for blowing out loose debris from internal tubing and hard-to-reach spots.
- Descaling solution. If you prefer a store-bought option, commercial descalers work well too. Just follow the product instructions carefully.
- Paper towels. Great for drying parts quickly and wiping up spills during the cleaning process.
Having everything ready before you start makes the whole process faster and smoother. Set aside about 30 to 45 minutes for a full clean auto coffee maker session. It is time well spent for a machine that serves you every single day.
Step-by-Step Guide to Clean Auto Coffee Maker
Now let us get into the actual cleaning process. We have broken it down into simple steps that anyone can follow. Whether you have a basic drip machine or a more advanced programmable brewer, these steps apply to most auto drip coffee maker models.
Step 1: Unplug and Disassemble
Safety first. Always unplug your coffee maker before you start cleaning. Let the machine cool down completely if you just finished brewing. Once it is cool, remove all detachable parts. This typically includes the carafe, filter basket, reusable filter, lid, and any other removable components.
Take a photo or make a mental note of how everything fits back together. This makes reassembly much easier. Lay all the parts out on a clean towel or in the sink so you can access each piece individually.
Step 2: Wash Removable Parts
Fill your sink with warm water and add a few drops of dish soap. Submerge the carafe, filter basket, and any other removable parts. Let them soak for about 10 to 15 minutes. This loosens dried coffee oils and residue.
After soaking, use a soft sponge or cloth to wash each piece thoroughly. For the filter basket, use your soft-bristled brush to scrub away grounds stuck in the mesh or perforations. Rinse everything with clean warm water and set them aside to air dry.
Quick Tip: If you notice stubborn coffee stains in your carafe, make a paste with baking soda and a little water. Rub it gently with a soft cloth. The mild abrasion lifts stains without scratching the glass or plastic.
Step 3: Clean the Water Reservoir
The water reservoir is where mineral buildup happens most. Wipe the inside with a damp microfiber cloth. Use cotton swabs dipped in a little vinegar to clean around the edges and any small openings. Do not use abrasive sponges here. They can scratch the plastic and create tiny grooves where bacteria can hide.
If your reservoir has a removable lid, take it off and wash it separately with warm soapy water. Dry everything completely before moving to the next step.
Step 4: Run a Vinegar Cleaning Cycle
This is the most important step for descaling your coffee maker. Mix equal parts white vinegar and water. Pour the solution into the water reservoir. For a standard 12-cup machine, use about 6 cups of vinegar and 6 cups of water.
Place a clean filter in the basket (or leave it empty if your machine does not require one for this cycle). Put the carafe in its position. Run a full brew cycle without coffee grounds. The vinegar solution will circulate through the internal tubing and break down mineral deposits.
Once the cycle finishes, let the machine sit for 15 to 30 minutes. This gives the vinegar time to dissolve any remaining scale. Then run two to three full cycles with fresh plain water to rinse out all the vinegar. Taste the water from the last rinse cycle. If it still smells like vinegar, run one more rinse cycle.
Expert Insight: If your machine has a “clean” or “descale” indicator light, running this vinegar cycle usually clears it. Some newer auto coffee maker models have specific descaling modes. Check your user manual for instructions tailored to your machine.
Step 5: Wipe Down the Exterior
While the machine is running its rinse cycles, take the time to wipe down the exterior. Use a damp microfiber cloth with a little mild dish soap. Wipe the housing, the warming plate, the control panel, and any buttons or dials.
For sticky spots or dried coffee splashes, dampen your cloth with a bit of vinegar solution. Wipe gently and dry with a clean towel. The warming plate often accumulates dried coffee spills. A paste of baking soda and water works wonders here too.
Step 6: Reassemble and Enjoy
Once everything is clean and dry, put all the parts back together. Make sure the carafe is seated properly, the filter basket is in place, and the reservoir lid is secure. Plug the machine back in and brew a test batch of plain water or a fresh cup of coffee.
Your auto coffee maker should now be running better and brewing coffee that tastes fresh and clean. Notice the difference? That is what regular maintenance does for your machine.
How to Descale Your Auto Coffee Maker
Descaling is the process of removing mineral deposits, primarily calcium and lime scale, from the internal components of your coffee maker. These deposits build up over time, especially if you use hard water. Left unchecked, they can clog tubes, reduce heating efficiency, and seriously affect the taste of your coffee.
Most experts recommend descaling your machine every one to three months depending on how often you use it and the hardness of your water. Here are the most effective methods for coffee maker descaling:
Vinegar Descaling Method
This is the most popular and affordable method. As we covered in the step-by-step guide above, white vinegar dissolves mineral deposits effectively. The acetic acid in vinegar breaks down scale without damaging the internal components of your machine.
Follow the same process: fill the reservoir with equal parts vinegar and water, run a brew cycle, let it sit for 15 to 30 minutes, then rinse with plain water two to three times. This method works great for most auto drip coffee maker models and is safe for all internal parts.
Lemon Juice Descaling Method
If you do not like the smell of vinegar, lemon juice is a great alternative. The citric acid in lemon juice dissolves mineral deposits just as effectively. Use the same ratio of lemon juice to water as you would with vinegar. Run the cycle, let it sit, and rinse thoroughly.
Lemon juice also leaves a fresh, mild citrus scent behind. Some people prefer this over the vinegar smell. Both methods work equally well for cleaning coffee maker internals.
Commercial Descaling Solution
Store-bought descalers are specifically formulated for coffee machines. They work fast and are convenient. Brands like Urnex, Dezcal, and Durgol make reliable products. Follow the package directions carefully. Most require you to fill the reservoir with the solution and water, run a cycle, and then rinse thoroughly.
Commercial solutions tend to be more expensive than vinegar, but they are formulated to be gentle on all machine types. If you own a premium machine or use your coffee maker heavily, investing in a quality descaler is worth it.
Common Mistakes to Avoid When Cleaning
Even with the best intentions, people make mistakes when cleaning their coffee makers. These errors can damage the machine or leave it less clean than before. Here are the most common pitfalls to watch out for:
- Using abrasive cleaners or steel wool. These scratch the interior surfaces and create tiny grooves where bacteria and scale can accumulate. Stick to soft cloths, sponges, and brushes only.
- Skipping the rinse cycles. If you do not rinse thoroughly after vinegar or descaling solution, your next pot of coffee will taste terrible. Always run at least two to three plain water cycles after any cleaning solution.
- Putting the carafe in the dishwasher when it is not dishwasher-safe. Check the manufacturer’s instructions. Some glass carafes are hand-wash only. Dishwashers can cloud or crack them over time.
- Using too much vinegar. Straight vinegar can damage rubber seals and internal tubing over time. Always dilute it with water before running it through the machine.
- Forgetting to clean the filter basket regularly. This is where most coffee residue builds up. A clogged filter basket restricts water flow and affects brewing temperature.
- Ignoring the warming plate. Dried coffee spills on the warming plate can burn on and become very hard to remove. Wipe it down after every use.
Avoiding these mistakes keeps your coffee maker maintenance routine effective and safe. A little care goes a long way in preserving the quality of your machine.
How Often Should You Clean Your Auto Coffee Maker
Consistency is key when it comes to coffee maker upkeep. Here is a simple cleaning schedule you can follow to keep your machine in top shape:
| Task | Frequency | What to Do |
|---|---|---|
| Wipe exterior and warming plate | After every use | Quick wipe with a damp cloth to remove spills and drips |
| Empty and rinse carafe and filter basket | After every use | Rinse with warm water and let air dry |
| Deep wash removable parts | Once a week | Wash with warm soapy water, scrub gently, rinse thoroughly |
| Run vinegar cleaning cycle | Every 1 to 3 months | Fill reservoir with vinegar and water, run brew cycle, rinse 2-3 times |
| Full disassembly and inspection | Every 6 months | Take apart all parts, inspect for wear, clean thoroughly |
Following this schedule ensures your clean brewing system stays in excellent condition. You will notice better coffee taste, faster brewing, and fewer issues over time. If you live in an area with hard water, you may need to descale more frequently.
Quick Tips for Keeping Your Coffee Maker Sparkling
Beyond the regular cleaning routine, a few extra habits can keep your machine running at its best. Here are some practical tips that make a big difference:
- Use filtered water. This reduces mineral content and slows down scale buildup significantly. Your machine will need less frequent descaling.
- Do not leave water sitting in the reservoir. Stagnant water promotes mold and bacteria growth. Empty any leftover water after each use.
- Leave the lid open after brewing. This allows the interior to air dry and prevents moisture buildup that leads to mold.
- Replace paper filters regularly. Even if you use a reusable filter, having spare paper filters on hand is handy. Paper filters trap fine grounds and oils that can clog the machine.
- Run a plain water cycle occasionally. Even on days you do not brew coffee, running a full cycle with fresh water flushes out any residual oils or debris.
- Store your machine in a dry, ventilated spot. Moisture trapped around the machine encourages mold. Keep it in a well-ventilated area of your kitchen.
These small habits take almost no extra time but pay off big. A well-maintained auto coffee maker can last for years and consistently deliver great-tasting coffee. Your morning routine deserves a machine that works as hard as you do.
Remember, cleaning auto coffee maker equipment does not have to be complicated or time-consuming. A few simple steps done regularly keep everything running smoothly. The vinegar rinse method, weekly washing of removable parts, and filtered water usage cover about 90 percent of what you need. The remaining 10 percent is just staying consistent with the routine.
If you ever notice persistent issues like slow brewing, unusual noises, or a burnt smell that does not go away after cleaning, it might be time to check your user manual or contact the manufacturer. Some problems go beyond routine cleaning and may require professional attention or replacement parts.
Take pride in your coffee setup. A clean machine is a happy machine. And a happy machine brews the perfect cup to start your day right. Start your coffee maker cleaning routine today and taste the difference in your next brew.
Frequently Asked Questions
Can I use bleach to clean my auto coffee maker?
No, you should never use bleach in a coffee maker. Bleach is too harsh and can leave behind chemical residues that are harmful if ingested. Stick to white vinegar, baking soda, or commercial descalers that are specifically designed for coffee equipment. These are safe and effective for cleaning auto coffee maker parts.
How do I get rid of the vinegar smell after cleaning?
The vinegar smell usually goes away after running two to three plain water rinse cycles. If the smell persists, try brewing a pot of plain water with a tablespoon of baking soda added. This neutralizes any remaining vinegar odor. You can also run a cycle with a slice of lemon in the reservoir for a fresh scent.
Can I put my coffee maker carafe in the dishwasher?
It depends on the manufacturer’s instructions. Most glass carafes are dishwasher-safe, but some thermal or plastic carafes are not. Always check the label or user manual. When in doubt, hand wash with warm soapy water and a soft sponge to preserve the carafe’s finish and longevity.
What causes the black spots inside my coffee maker?
Black spots are usually mold or mildew caused by moisture buildup. They can also be mineral deposits that have oxidized over time. Regular coffee maker maintenance including vinegar cycles and thorough drying prevents these spots. If you see mold, clean the machine immediately with a vinegar solution and run several rinse cycles.
How do I clean the inside tubing of my coffee maker?
The best way to clean internal tubing is by running a vinegar and water solution through a full brew cycle. The vinegar flows through the tubes and dissolves mineral deposits and coffee oils. For tough buildup, let the solution sit in the machine for 30 minutes before brewing. Always follow up with plain water rinse cycles to flush out all residue.
Is it safe to use lemon juice instead of vinegar to descale?
Yes, lemon juice is a safe and effective alternative to vinegar for coffee maker descaling. The citric acid works similarly to break down mineral deposits. Use the same ratio of lemon juice to water as you would with vinegar. Lemon juice also leaves a pleasant citrus scent behind, which many people prefer over the vinegar smell.
=== CONCLUSION ===
Your auto coffee maker works hard for you every morning. A little regular care goes a long way in keeping it performing at its best. By following the simple steps in this guide, you can clean auto coffee maker equipment easily and effectively using items you already have at home. Weekly washing, monthly descaling, and a few smart daily habits will keep your coffee tasting fresh and your machine running smoothly for years to come.
Start today. Pick one cleaning task and do it now. Your future self and your morning coffee will thank you. Great coffee starts with a clean machine, and now you have everything you need to make that happen.


