How To Adjust Temperature On Coffee Maker Right Now
Adjusting the temperature on your coffee maker can transform your daily brew from mediocre to magnificent. Whether you own a drip machine, single-serve pod system, or espresso maker, controlling the heat unlocks richer flavor and smoother extraction. This guide walks you through every method, from built-in controls to simple workarounds, so you can enjoy the ideal coffee brewing temperature right at home.
You wake up, pour your grounds into the basket, press start, and wait. But something feels off. The coffee tastes weak, sour, or flat. You might blame the beans or the grind size. But here is the truth most people miss: the temperature of the water hitting your grounds makes or breaks your cup. Learning how to adjust temperature on coffee maker is one of the simplest upgrades you can make. It costs nothing extra and takes just a few minutes. Whether your machine is a basic drip model or a fancy espresso setup, this guide will show you exactly what to do.
Think about it this way. You would never bake cookies at the wrong oven temperature and expect perfect results. The same logic applies to your morning brew. Water that is too cool under-extracts the coffee, leaving it thin and sour. Water that is too hot over-extracts, pulling out bitter compounds that ruin the flavor. The sweet spot sits between 195°F and 205°F. Most factory-made coffee makers aim for this range, but they do not always hit the mark. Over time, mineral deposits, wear and tear, and simple design flaws can throw off the heat. That is where knowing how to adjust comes in.
This article covers everything you need to know. We will walk through why temperature control matters, explain the different types of controls found on various machines, give you a step-by-step process for making adjustments, and share practical tools that help you monitor heat. By the end, you will have everything you need to brew a consistently great cup of coffee every single morning.
Key Takeaways
- Brewing temperature matters: The optimal range is 195°F to 205°F for the best flavor extraction.
- Most machines have hidden settings: Many coffee makers let you adjust heat even if it is not obvious.
- Thermometers help: A simple kitchen thermometer can measure your coffee maker’s actual water temperature.
- Descaling fixes temperature problems: Mineral buildup is a common cause of inconsistent heat.
- Preheating helps a lot: Warming your machine and mug before brewing improves overall cup temperature.
- Resetting often works: A factory reset can restore default temperature settings on many models.
📑 Table of Contents
- Why Temperature Matters So Much for Your Coffee
- Understanding Your Coffee Maker’s Temperature Controls
- Step-by-Step Guide to Adjusting Temperature On Coffee Maker
- Tools That Help You Control Coffee Maker Temperature
- Common Temperature Problems and How to Fix Them
- Expert Tips for Perfect Coffee Temperature Every Morning
- Conclusion
Why Temperature Matters So Much for Your Coffee
The Science Behind Brewing Temperature
Coffee extraction is a science. When hot water passes through ground coffee, it pulls out hundreds of flavor compounds. These include oils, acids, sugars, and caffeine. Each compound dissolves at a different rate and temperature. The ideal coffee brewing temperature balances all of these elements so you get a full-bodied, flavorful cup without bitterness or sourness.
The Specialty Coffee Association, or SCA, recommends water between 195°F and 205°F for optimal extraction. At this range, water is hot enough to dissolve the desirable compounds but not so hot that it strips away the pleasant flavors. Below 195°F, the brew tends to taste under-extracted and sour. Above 205°F, it becomes over-extracted and bitter. This narrow window is why controlling your machine’s heat is so important.
Interestingly, many home coffee makers actually brew below this range. A study by the Coffee Science Foundation found that some machines pour water as low as 180°F. That is far too cool for proper extraction. This means even the best quality beans can produce disappointing results if the coffee maker heat settings are not right. Adjusting the temperature gives you control over the extraction process and dramatically improves taste.
What Happens When Temperature Is Too High or Too Low
Too little heat and your coffee tastes sour and thin. The water moves through the grounds too quickly without pulling out enough flavor. You end up with a weak, acidic cup that leaves you reaching for more sugar. Too much heat and the opposite problem occurs. Bitter compounds dominate, and the natural sweetness of the beans gets lost. The coffee can also taste burnt or harsh.
Temperature also affects brew time indirectly. Hotter water extracts faster, which can shorten the brew cycle. Cooler water takes longer, which can lead to over-extraction even at lower temperatures. Understanding this balance helps you make smarter adjustments. If you are wondering how to adjust temperature on coffee maker, the first step is figuring out whether your current brew runs too hot or too cold.
Understanding Your Coffee Maker’s Temperature Controls
Not all machines are created equal. Some give you direct control over heat, while others lock you into a fixed setting. Knowing what type of machine you have is the first step toward making a change.
Built-In Temperature Controls on Modern Machines
Many newer coffee makers come with adjustable temperature settings right on the control panel. These machines often include a digital display where you can select a specific heat level or range. Some models let you choose between bold, regular, and mild settings, which essentially change the water temperature. The bold setting usually increases heat to extract more flavor, while the mild setting lowers it for a smoother taste.
High-end machines from brands like Breville, Bonavita, and Technivorm offer precise temperature control in degree increments. These are the easiest machines to work with when you want to fine-tune your brew. If your machine has a digital interface or a “bold” button, check the manual to see if temperature adjustment is available. You might be surprised by how much control you already have.
Machines Without Adjustable Settings
Many popular drip coffee makers and pod machines do not include a temperature dial or digital setting. Machines like basic Hamilton Beach models or standard Keurig systems often run at a factory-set temperature that you cannot change directly. This does not mean you are stuck, though. There are several workarounds that effectively let you control the heat even on machines with fixed settings.
For example, much like learning how to turn on a Hamilton Beach toaster oven requires understanding its preset modes, working with a fixed-temperature coffee maker means using external methods to influence the final brew heat. Preheating the water before adding it to the reservoir is one of the most effective strategies. We will cover this in detail later in the article.
Temperature Control on Espresso Machines
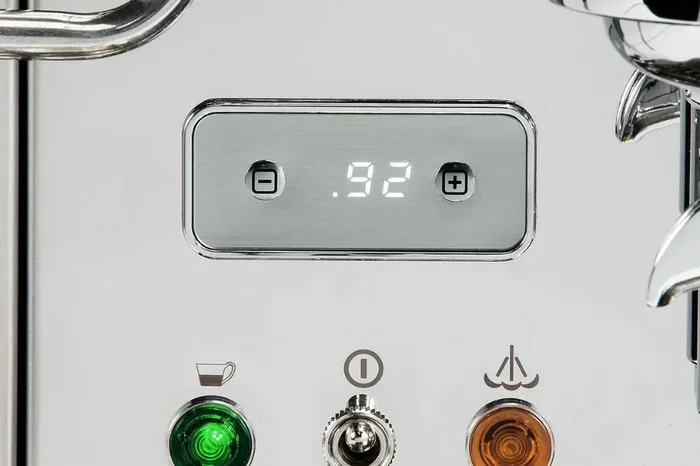
Espresso machines operate differently from drip brewers. They force hot water through finely ground coffee at high pressure, which makes temperature control even more critical. Many espresso machines include a PID controller, which stands for proportional-integral-derivative. This is a thermostat that maintains precise temperature throughout the brewing process. Some machines allow you to set the PID temperature manually through a digital display.
If your espresso machine has a PID, you can adjust the brew temperature in single-degree increments. This level of precision is what makes espresso so rewarding to perfect at home. Even without a PID, you can still influence the temperature by adjusting the grind size, tamp pressure, and pre-infusion time. These factors all interact with heat to shape the final flavor.
Step-by-Step Guide to Adjusting Temperature On Coffee Maker
Now that you understand why temperature matters and what kind of controls your machine has, let us walk through the actual process of making adjustments. Follow these steps in order for the best results.
Step 1: Measure Your Current Brewing Temperature
Before you change anything, you need to know what your machine is doing right now. Run a full brew cycle with clean water and no coffee grounds. Use a coffee maker thermometer to measure the water temperature as it comes out of the basket. A quick-read digital thermometer works best. Place it in the stream of water right as it exits the shower head or drip spout.
Write down the temperature. If it falls between 195°F and 205°F, your machine is already in the ideal range and may not need adjustment. If it is below 195°F, your brew is likely under-extracted. If it is above 205°F, it is probably over-extracting and tasting bitter. This baseline measurement tells you exactly how much you need to adjust.
Step 2: Check for a Temperature Setting or Menu
Consult your coffee maker’s user manual. Look for any mention of temperature settings, brew strength, or heat control. Some machines bury this option in a settings menu that you access by pressing and holding certain buttons. Others have a physical dial on the back or side of the unit.
If your machine has a temperature setting, adjust it to the 195°F to 205°F range. Run another test brew and measure again. You may need to repeat this process a couple of times to find the perfect setting for your taste preferences. Some people prefer slightly cooler water for lighter roasts and hotter water for dark roasts, so experiment and see what works best for you.
Step 3: Use the Pre-Heating Method for Fixed-Temperature Machines
If your machine does not have adjustable settings, the pre-heating method is your best friend. Start by boiling water separately. Let it cool for about 30 seconds to bring it close to 200°F. Then pour this preheated water into the coffee maker’s reservoir instead of cold tap water.
This simple trick raises the overall brew temperature significantly. The machine still runs its internal heating element, but it starts from a much higher baseline. You can also preheat the carafe or mug by rinsing it with hot water before brewing. This prevents the container from absorbing heat and cooling down your coffee too fast.
Just as precision matters when you cook fries in oven at 425, getting the starting water temperature right makes a measurable difference in your final cup. Small changes in input temperature lead to noticeable changes in the brew.
Step 4: Adjust the Grind Size to Compensate
Temperature and grind size work together. If you cannot raise the machine’s heat, you can compensate by using a finer grind. A finer grind increases the surface area of the coffee, which speeds up extraction and helps achieve a fuller flavor even at lower temperatures. If your brew tastes sour, try grinding slightly finer. If it tastes bitter, go coarser.
This is not a perfect replacement for actual temperature control, but it is a powerful workaround. Many coffee enthusiasts use this method in combination with preheated water for excellent results. The key is to make small adjustments and taste the difference after each change.
Tools That Help You Control Coffee Maker Temperature
You do not need expensive equipment to take control of your brew temperature. A few simple tools can make a big difference.
- Digital kitchen thermometer: This is the most important tool. A thermometer lets you measure the actual temperature of your brew, so you know whether your adjustments are working. Look for one with a quick-read display and a probe thin enough to fit in a coffee stream.
- Gooseneck kettle with temperature control: These kettles let you set a precise target temperature and hold the water there. Pouring preheated water into your coffee maker’s reservoir ensures a consistent starting point every time.
- Coffee scale with timer: A scale helps you measure the exact amount of coffee and water, which affects extraction. Some scales also include a built-in timer that tracks brew time, giving you another variable to control alongside temperature.
- Descaling solution: Mineral buildup inside your machine acts like insulation around the heating element. This trapped heat raises the internal temperature of the machine but reduces the heat that reaches the water. Descaling removes this buildup and restores proper heat transfer.
Common Temperature Problems and How to Fix Them
Problem: Coffee Tastes Sour and Weak
Sour coffee almost always means the water was too cool or the brew time was too short. Start by measuring the output temperature. If it is below 195°F, use the pre-heating method described above. Also check that your machine is not brewing too quickly. A clogged filter basket or incorrect grind size can speed up the flow and reduce extraction time.
If you have hard water, mineral deposits may be blocking the internal tubes. This restricts water flow and changes how heat transfers through the system. Running a descaling cycle with a coffee maker maintenance solution can clear these blockages and restore normal temperature performance. Think of it the same way you would clean burnt food from an oven; regular cleaning keeps everything running at its best.
Problem: Coffee Tastes Bitter and Burnt
Bitter coffee usually signals that the water is too hot or that extraction is pulling too long. If your machine has a temperature setting, lower it by a few degrees. If it does not, try using slightly cooler preheated water or a coarser grind to slow extraction. Also check that your machine is not holding the brewed coffee on a hot plate for too long. Prolonged heat on the carafe causes continued extraction, which adds bitterness.
Problem: Temperature Inconsistency Between Brews
If one cup tastes great and the next tastes off, the machine may not be maintaining a consistent temperature. This is common in machines with aging heating elements. The heating coil weakens over time and cannot sustain a steady heat level. In this case, descaling may help if mineral buildup is the cause. If not, the machine may need a new heating element or replacement. Regular coffee maker maintenance extends the life of the heating component and keeps temperature consistent over time.
Expert Tips for Perfect Coffee Temperature Every Morning
Here are some extra insights from experienced baristas and coffee professionals that will take your brewing to the next level.
- Store your coffee maker in a cool, dry place. Ambient temperature affects how quickly the machine heats water. A machine in a cold kitchen will take longer to reach the target temperature, which can lower the brew heat.
- Flush the machine before brewing. Run a cycle with just hot water before adding coffee grounds. This rinses the internal passages and ensures the water that touches your coffee is fresh and hot.
- Use filtered water. Hard water with high mineral content insulates the heating element and reduces heat transfer. Filtered water heats more evenly and helps maintain consistent temperature.
- Preheat your mug. Even if the brew temperature is perfect, a cold mug will steal heat from the coffee immediately. Rinsing your mug with hot water before pouring keeps the coffee at the right drinking temperature longer.
- Keep a brew log. Write down the temperature, grind size, brew time, and taste notes for each cup. Over time, you will see patterns that help you dial in the perfect settings for your specific machine and beans.
Remember that adjusting temperature is just one part of making great coffee. Bean freshness, grind quality, water ratio, and brew time all work together. But temperature is the foundation. Get the heat right, and everything else falls into place much more easily.
Conclusion
Learning how to adjust temperature on coffee maker is one of the most impactful things you can do for your daily brew. Whether your machine has built-in controls or you need to use workarounds like preheated water and grind size adjustments, the result is the same: a better-tasting cup of coffee. The optimal coffee brewing temperature between 195°F and 205°F gives you the best balance of flavor, aroma, and body. Start by measuring your current brew temperature, then use the steps in this guide to make changes. With a little practice and attention, you will notice the difference in every single cup. Your morning routine deserves this level of care, and your taste buds will thank you.
Frequently Asked Questions
What is the best temperature to brew coffee at?
The ideal coffee brewing temperature is between 195°F and 205°F, according to the Specialty Coffee Association. This range extracts the most flavor without pulling out bitter or sour compounds. Most coffee experts agree that 200°F is the sweet spot for a balanced, flavorful cup.
Can I adjust the temperature on a Keurig coffee maker?
Most Keurig machines do not have a direct temperature setting, but you can influence the brew heat by using the smallest cup size, which runs water through the grounds faster and at a slightly higher temperature. You can also preheat the water you add to the reservoir. Some newer Keurig models include a temperature control feature, so check your specific model’s settings.
Why does my coffee taste different after I adjust the temperature?
Temperature directly affects extraction, which is the process of pulling flavor compounds from the coffee grounds. Higher temperatures extract more compounds faster, which can bring out bitterness if pushed too far. Lower temperatures extract more slowly and may leave the coffee tasting sour or thin. Adjusting temperature changes the balance of these extracted compounds, which is why the flavor profile shifts.
How often should I descale my coffee maker to maintain proper temperature?
You should descale your coffee maker every one to three months, depending on how often you use it and the hardness of your water. Mineral buildup acts as insulation around the heating element, which reduces heat transfer and can lower the brewing temperature. Regular descaling keeps the heating element efficient and maintains consistent coffee maker heat settings.
Do I need a special thermometer to measure coffee temperature?
A standard digital kitchen thermometer works perfectly for measuring coffee maker output temperature. You do not need a specialized coffee thermometer, though those exist if you want a more precise tool. The key is to measure the water temperature as it exits the coffee basket during a brew cycle with no coffee grounds in the filter.
Can I use a temperature-controlled kettle with any coffee maker?
Yes, a gooseneck kettle with temperature control works with any coffee maker that uses a water reservoir. Simply heat the water to your desired temperature in the kettle, then pour it into the reservoir. This method is especially useful for machines without built-in temperature controls. It gives you precise input temperature control regardless of the machine type.
=== INTERNAL LINKS ===
Much like learning how to turn on a Hamilton Beach toaster oven, adjusting your coffee maker’s temperature requires understanding your specific machine’s controls. How To Turn On Hamilton Beach Toaster Oven
Regular cleaning keeps your machine running at its best, just as you would clean burnt food from an oven to maintain performance. How To Clean Oven With Burnt Food
Just as precision matters when you cook fries in oven at 425, getting the right brewing temperature makes all the difference in your final cup. How Long To Cook Fries In Oven At 425