How To Prepare A Juicy Turkey In The Oven Step By Step
Learn how to prepare a juicy turkey in the oven with our simple step-by-step guide. This article covers everything from choosing the right bird to cooking time, oven temperature, seasoning tricks, and carving tips. Whether it is your first Thanksgiving or you are a seasoned cook, you will find practical advice that makes roast turkey easy and delicious every single time.
Nothing beats the aroma of a perfectly roasted turkey filling your kitchen on a chilly evening. Whether you are preparing for Thanksgiving dinner or hosting a special holiday meal, how to prepare a turkey in the oven is a skill every home cook should master. The good news is that it is not as complicated as it might seem. With the right approach, a few simple ingredients, and a little patience, you can create a juicy turkey in the oven that will have everyone asking for seconds.
This guide walks you through every single step of the process. From selecting the perfect bird at the store to pulling it out of the oven golden and perfectly cooked, we have you covered. You will learn about seasoning techniques, oven temperatures, cooking times, and the little tricks that separate a good roast turkey from a great one. Let us get started on your journey to oven-roasted turkey perfection.
Key Takeaways
- Choose the right size turkey: Plan about one pound per person for a comfortable serving.
- Brine or dry brine your turkey: This is the secret to juicy, flavorful meat that stays moist throughout cooking.
- Cook at 325°F for even roasting: This low and slow approach prevents drying out and promotes crispy skin.
- Use a meat thermometer: The internal temperature should reach 165°F in the thickest part of the thigh.
- Let the turkey rest for 30 minutes: Resting allows the juices to redistribute for a juicier result.
- Baste every 45 minutes: Regular basting keeps the turkey moist and helps the skin turn golden brown.
- Carve carefully with sharp tools: Proper technique preserves the meat and makes serving effortless.
📑 Table of Contents
- How To Choose The Right Turkey
- Preparing And Seasoning Your Turkey
- Setting The Right Oven Temperature
- Cooking Time And Temperature Guide
- Basting And Resting For Maximum Juiciness
- Carving And Serving Your Perfect Turkey
- Common Mistakes To Avoid When Roasting Turkey
- Expert Tips For The Perfect Turkey Every Time
- Conclusion
How To Choose The Right Turkey
Before you even think about turning on the oven, you need to pick the right bird. This is the foundation of your entire meal, and getting it right makes everything else easier. Here is what to look for when you are shopping for your oven roasted turkey.
Fresh vs Frozen Turkey
You have two main options at the grocery store: fresh or frozen. A fresh turkey is already thawed and ready to cook. It tends to have a slightly better texture and flavor. However, you need to buy it closer to your cooking date because it does not last as long in the fridge.
A frozen turkey is more convenient for planning ahead. You can buy it weeks in advance and store it in your freezer. The catch is that you need to thaw it properly. A good rule of thumb is to allow 24 hours of thawing in the refrigerator for every four to five pounds of turkey. Never thaw a turkey on the counter. This creates a safety risk and can lead to uneven thawing.
Size Matters
When deciding on the size of your turkey, think about how many people you are feeding. A good guideline is one pound of turkey per person. This accounts for the bones and any leftovers you might want for sandwiches the next day.
For a family of six, a 12 to 14 pound turkey works well. If you are hosting a larger gathering, you might need an 18 or 20 pounder. Keep in mind that very large turkeys, over 20 pounds, can be tricky to cook evenly. The breast meat might dry out before the thighs reach the right temperature. If you are unsure, going with a medium-sized bird gives you the best results.
Check For Quality
Look for a turkey with plump, creamy-white skin. The bird should feel firm and not soft or mushy. If you are buying a fresh turkey, check the sell-by date. For frozen turkeys, make sure the packaging is intact with no signs of freezer burn. A free-range or organic turkey often has more flavor, but a standard store-bought bird works perfectly fine for a delicious holiday turkey.
Preparing And Seasoning Your Turkey
This is where the magic happens. Proper preparation and seasoning transform a plain bird into a flavorful masterpiece. You have several options for how to prep your turkey roast, and we will walk through the most effective ones.
Brining Your Turkey
Brining is one of the best things you can do for your turkey. A brine is a saltwater solution that you soak the bird in for several hours or overnight. The salt helps the meat retain moisture during cooking, which means juicier results every time.
To make a simple brine, dissolve one cup of kosher salt in one gallon of water. You can also add sugar, herbs like thyme and rosemary, and aromatics like garlic and bay leaves. Submerge your turkey in the brine and refrigerate for 12 to 24 hours. After brining, rinse the turkey thoroughly and pat it completely dry with paper towels. This step is important because excess moisture on the surface can prevent the skin from crisping up.
Dry Brine As An Alternative
If you do not have the time or space for a wet brine, try a dry brine instead. This method is simpler and just as effective. Simply rub the entire turkey with kosher salt, about one tablespoon per pound. Place the bird uncovered on a rack in the refrigerator for 12 to 24 hours. The salt draws out moisture, which then gets reabsorbed into the meat. The result is seasoned, juicy turkey with beautifully crispy skin.
Seasoning And Stuffing
Once your turkey is prepped, it is time to add flavor. A classic approach is to rub softened butter under the skin of the breast and all over the bird. This adds richness and helps the skin turn golden and crispy. Then sprinkle your favorite turkey seasoning generously over the entire surface.
Popular seasoning blends include garlic powder, onion powder, paprika, black pepper, dried sage, and thyme. You can also add fresh herbs inside the cavity of the turkey. Some people stuff the turkey with aromatics like onion quarters, celery, lemon halves, and fresh herbs. This infuses the meat with flavor from the inside out as it cooks.
If you prefer to cook stuffing separately, that is perfectly fine too. Cooking stuffing outside the bird is actually safer because it ensures the stuffing reaches the proper temperature without overcooking the turkey. Whether you stuff the bird or not, the flavor will still be fantastic.
Setting The Right Oven Temperature
The temperature you use is one of the most important factors in how to prepare a turkey in the oven. Too high, and the outside burns before the inside cooks. Too low, and you are waiting around for hours with no guarantee of crispy skin.
Why 325°F Is The Sweet Spot
Most cooking experts and food safety organizations recommend roasting a turkey at 325°F. This temperature cooks the bird evenly from edge to center. It gives the skin enough time to crisp up without burning, while the inside cooks through gently and stays moist.
Some recipes call for starting at a higher temperature, like 425°F, for the first 30 minutes to kickstart the browning. Then you reduce the heat to 325°F for the remainder of the cook. This technique works well and can give you a beautifully golden crispy turkey skin right from the start.
Positioning The Turkey In The Oven
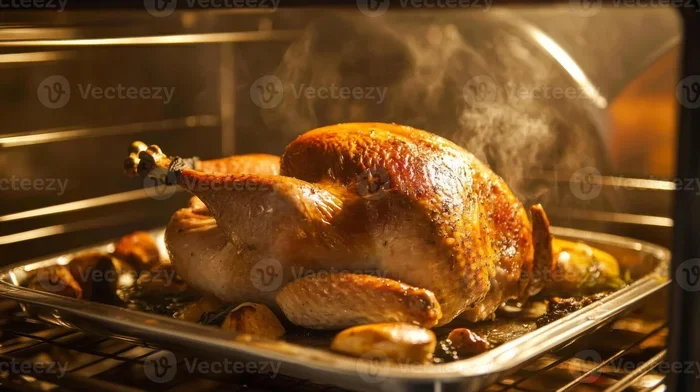
Place your turkey breast-side up on a rack inside a roasting pan. The rack allows hot air to circulate around the bottom of the bird, which promotes even cooking. It also keeps the turkey from sitting in its own drippings, which can make the bottom soggy.
If you do not have a roasting rack, you can create a bed of chopped onions, carrots, and celery in the bottom of the pan. The turkey sits on top of these vegetables, and they serve a similar purpose. They also add flavor to your turkey drippings, which you can use to make a delicious gravy later.
Covering With Foil
Some cooks like to cover the turkey with aluminum foil for the first part of the cooking process. This traps moisture and keeps the breast meat from drying out. You can remove the foil during the last 30 to 45 minutes to let the skin crisp up.
However, many experienced cooks skip the foil entirely. They find that cooking the turkey uncovered the whole time produces better results. The skin gets crispier, and the flavor is more concentrated. Try both methods and see which one you prefer. There is no wrong answer when it comes to making a great roast turkey.
Cooking Time And Temperature Guide
Knowing how long to cook your turkey is essential for a successful meal. The cooking time depends on the size of your bird and whether you start from a fresh or frozen state. Here is a general guide to help you plan your Thanksgiving turkey or holiday feast.
General Cooking Times
As a rough estimate, an unstuffed turkey needs about 13 minutes per pound at 325°F. Here is a quick reference table for common turkey sizes.
| Turkey Weight | Approximate Cooking Time | Internal Temp Target |
|---|---|---|
| 8-12 pounds | 2.5 to 3 hours | 165°F |
| 12-14 pounds | 3 to 3.75 hours | 165°F |
| 14-18 pounds | 3.75 to 4.5 hours | 165°F |
| 18-20 pounds | 4.5 to 5 hours | 165°F |
| 20-24 pounds | 5 to 6 hours | 165°F |
These times are approximate. Every oven is different, and the actual cooking time may vary. The most reliable way to know when your turkey is done is by using a meat thermometer. This is the single most important tool for cooking turkey.
Using A Meat Thermometer
A meat thermometer takes the guesswork out of cooking turkey. Insert the probe into the thickest part of the thigh, making sure it does not touch the bone. The internal temperature should read 165°F when the turkey is fully cooked.
Check the temperature in multiple spots. The breast and the thigh can cook at slightly different rates. The thigh usually takes a bit longer, so pay extra attention to that area. If the breast is reaching 165°F but the thigh is still a few degrees short, you can cover the breast with foil and keep cooking until the thigh reaches the target temperature.
Avoiding Overcooking
Overcooking is the number one mistake people make with roast turkey. When the turkey cooks too long, the lean breast meat dries out and becomes tough. Nobody wants that. To avoid this, start checking the temperature about 30 minutes before the estimated finish time. This gives you a window to pull the turkey out at exactly the right moment.
Also remember that the turkey continues to cook after you take it out of the oven. This is called carryover cooking. The internal temperature can rise by 5 to 10 degrees during the resting period. So if you pull the turkey out when the thigh reads 160°F, it will reach 165°F by the time you are ready to carve. This is a helpful trick for keeping your turkey perfectly moist.
Basting And Resting For Maximum Juiciness
The steps you take after the turkey comes out of the oven are just as important as the cooking process itself. Basting during cooking and resting before carving are two simple habits that make a huge difference in the final result.
How To Baste Your Turkey
Basting means spooning the hot juices from the bottom of the roasting pan over the turkey while it cooks. This keeps the surface of the bird moist and adds layers of flavor. It also helps the skin turn an even, beautiful golden brown.
Plan to baste your turkey every 45 minutes or so. Use a large spoon or a baster to scoop up the juices from the pan. Pour them slowly over the top of the turkey, especially over the breast area. Be careful when you open the oven door, as the heat will escape quickly. Try to keep the oven door open for as little time as possible.
Some cooks skip basting altogether, and that is okay too. If you use a dry brine and cook at the right temperature, your turkey will still turn out delicious. Basting is a nice-to-have, not a must-have. Do what works best for you and your schedule.
The Importance Of Resting
Once your turkey is done, resist the urge to cut into it right away. Let it rest for at least 30 minutes before carving. During this resting period, the juices inside the meat redistribute and settle. When you finally slice into the turkey, those juices stay in the meat instead of running out onto the cutting board.
To keep the turkey warm while it rests, tent it loosely with aluminum foil. Do not wrap it tightly, as this can trap too much steam and make the skin soggy. A loose tent keeps the heat in without compromising that beautiful crispy texture you worked so hard to achieve.
Making Gravy From The Drippings
While your turkey is resting, take advantage of the flavorful drippings in the roasting pan. Making gravy from scratch is easier than you might think. Simply pour off the excess fat, leaving about a cup of drippings in the pan. Add a cup of chicken or turkey broth and place the pan on the stovetop over medium heat. Whisk in a tablespoon of flour or cornstarch to thicken the mixture. Season with salt and pepper to taste. In about 10 minutes, you have a rich, homemade gravy that elevates the entire meal.
Carving And Serving Your Perfect Turkey
The final step is carving your turkey, and doing it right makes serving easier and keeps the meat tender. You do not need any fancy tools, just a sharp knife and a sturdy fork.
Carving Tips
Start by removing the twine or any kitchen twine holding the turkey together. Then use your knife to slice along the breast bone and separate the breast meat from the ribcage. Cut the breast into even slices about half an inch thick, cutting against the grain for maximum tenderness.
Next, separate the thighs from the body by cutting through the joint. Then cut the drumstick from the thigh if you prefer smaller pieces. The wings can be pulled off and served as-is. If you stuffed the turkey, use a spoon to scoop out the stuffing and serve it separately.
Arrange the carved pieces on a warm serving platter. Spoon some of the pan drippings or your homemade gravy over the meat right before serving. This adds moisture and incredible flavor to every bite.
Storing Leftovers
Leftover turkey makes some of the best meals after the big day. Store the carved meat in an airtight container in the refrigerator within two hours of cooking. Properly stored, cooked turkey stays fresh for up to four days. You can also freeze it for up to three months. Use leftover turkey in sandwiches, soups, casseroles, and salads for delicious meals throughout the week.
Common Mistakes To Avoid When Roasting Turkey
Even experienced cooks can run into trouble when making roast turkey. Here are some common mistakes to watch out for so your next turkey comes out perfectly.
- Not thawing the turkey properly: A frozen turkey going into a hot oven cooks unevenly and can be unsafe. Always thaw completely in the refrigerator.
- Skipping the thermometer: Relying on a timer alone is not enough. A meat thermometer is the only way to know for sure that your turkey is fully cooked.
- Overcooking the bird: Set a timer and check the temperature early. Pulling the turkey out at 160°F in the thigh gives you a buffer for carryover cooking.
- Forgetting to rest the turkey: Cutting into the turkey immediately causes the juices to run out, leaving dry meat behind.
- Not seasoning enough: Turkey meat on its own is mild. Be generous with your seasoning, both inside and outside the bird.
- Using a pan without a rack: This causes the bottom to steam instead of roast, resulting in soggy skin.
Expert Tips For The Perfect Turkey Every Time
Here are some bonus tips from experienced cooks that take your turkey from good to outstanding.
First, bring your turkey to room temperature before it goes in the oven. Take it out of the refrigerator about one hour before cooking. This helps the bird cook more evenly from edge to center. A cold turkey going into a hot oven means the outside overcooks while the inside is still catching up.
Second, separate the wing tips from the body and tuck the wing tips under the turkey. This prevents them from burning and gives the bird a more uniform shape. It also makes carving easier later on.
Third, consider adding a splash of broth or stock to the bottom of the roasting pan. This creates steam that keeps the environment moist around the turkey. It is especially helpful if you are cooking a larger bird or if your oven tends to run dry.
Fourth, save your turkey neck and giblets. They make an incredible base for gravy and stock. Simmer them with onion, celery, and herbs for about an hour, strain the liquid, and use it as the foundation for your gravy. The flavor difference is remarkable.
Finally, do not stress. Cooking a turkey can feel intimidating, especially if it is your first time. But with this guide, the right tools, and a little confidence, you will pull off a stunning roast turkey that everyone will remember. The most important ingredient is not a spice or a technique. It is the care and love you put into preparing the meal.
Conclusion
Learning how to prepare a turkey in the oven is one of the most rewarding cooking skills you can develop. It might seem like a big project, but when you break it down into manageable steps, it becomes much more approachable. Choose a good bird, brine or season it well, cook it at 325°F, use a meat thermometer, let it rest, and carve with confidence. Follow these steps and you will serve a juicy turkey in the oven that earns compliments from everyone at the table.
The beauty of roast turkey is that it brings people together. It is more than just a meal. It is a tradition, a centerpiece, and a symbol of gathering and gratitude. So the next time you stand in front of your oven wondering if you can pull it off, remember that you absolutely can. You have all the knowledge and tools you need right here. Now go make that turkey, and enjoy every moment of it.
Frequently Asked Questions
How long does it take to cook a turkey in the oven?
A general rule is about 13 minutes per pound at 325°F for an unstuffed turkey. So a 12-pound turkey takes roughly 3 to 3.5 hours. Always use a meat thermometer to confirm doneness. The internal temperature should reach 165°F in the thickest part of the thigh.
Should I cover my turkey with foil while roasting?
Covering with foil traps moisture and keeps the breast meat from drying out. You can remove the foil during the last 30 to 45 minutes to let the skin crisp up. However, many cooks prefer to roast the turkey uncovered the entire time for better texture and flavor.
What is the best temperature to cook a turkey?
325°F is the recommended temperature for roasting turkey. This low and slow approach cooks the bird evenly and helps the skin turn crispy without burning the outside. Some cooks start at 425°F for the first 30 minutes to jumpstart browning, then reduce to 325°F.
Do I need to brine my turkey before roasting?
Brining is not required, but it is highly recommended for juicier results. A wet brine or dry brine helps the meat retain moisture during cooking. If you do not have time to brine, simply rubbing butter and seasoning under the skin will still produce a flavorful roast turkey.
How do I know when the turkey is done without a thermometer?
It is very difficult to tell without a meat thermometer. The juices should run clear when you pierce the thickest part of the thigh, but this is not always a reliable indicator. We strongly recommend using a meat thermometer for food safety and the best results. The internal temperature must reach 165°F.
Can I cook a turkey from frozen in the oven?
Yes, but it takes significantly longer. The USDA says it is safe to cook a frozen turkey, but you should expect about 50 percent more cooking time. The turkey must reach 165°F internally throughout. For the most even results, thawing in the refrigerator first is the preferred method.